


Post by fots2 on May 23, 2010 22:20:52 GMT 8
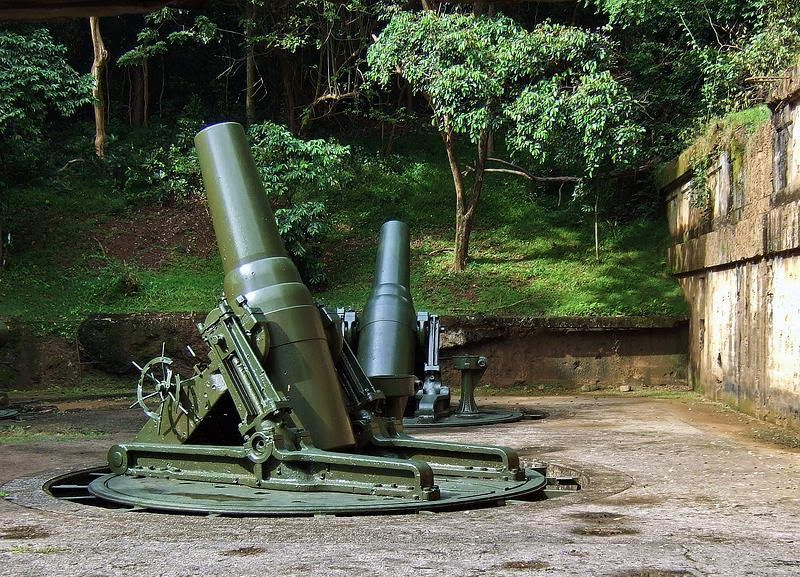
For me these stubby mortars will never be as sexy as the big coastal rifles. However, no one can argue that both of Corregidor’s mortar batteries certainly earned their place in history. They are well worth a visit.
Considering all the pounding Battery Way received in WWII it is still quite intact. Exterior battle scars are everywhere but interior magazines and passageways are in very good condition.
Since Battery Way is on the day tour, the grounds are swept daily plus vegetation and garbage are kept in check. I hate to say it but I feel a slight artificial feeling to the place when comparing it to un-groomed locations.
I notice that the mortars have been painted a dark green in the last year or two. My photos were taken in different seasons and even different years so you will notice slight changes in the same scene. In the rainy season the battery has moss growing in many areas.
Detailed battery history is on Corregidor.org so I will not repeat it here.
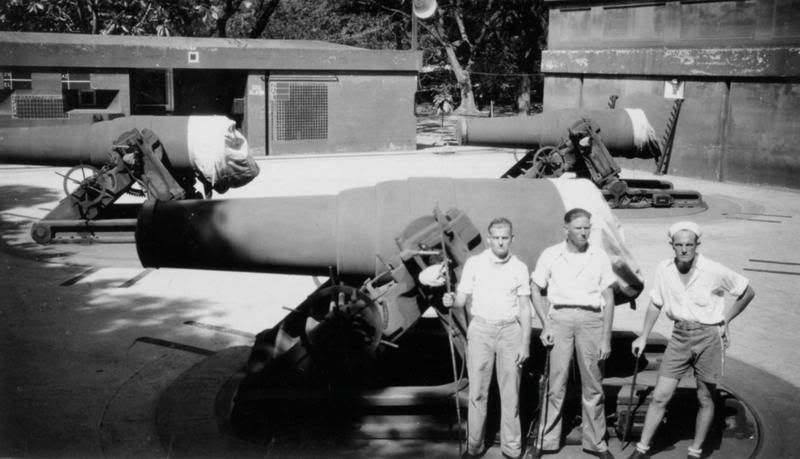
A pre-war view of Battery Way’s gun pit.
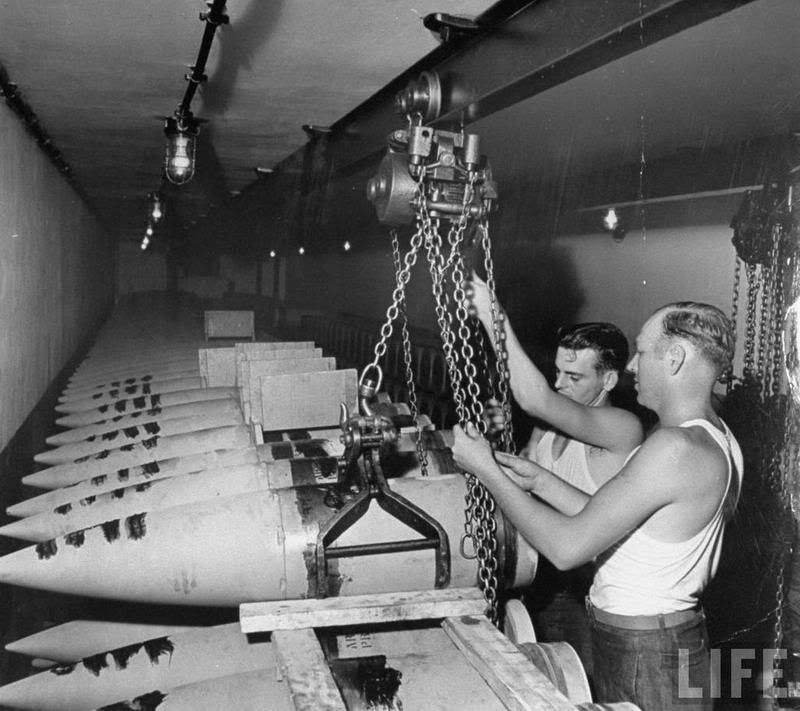
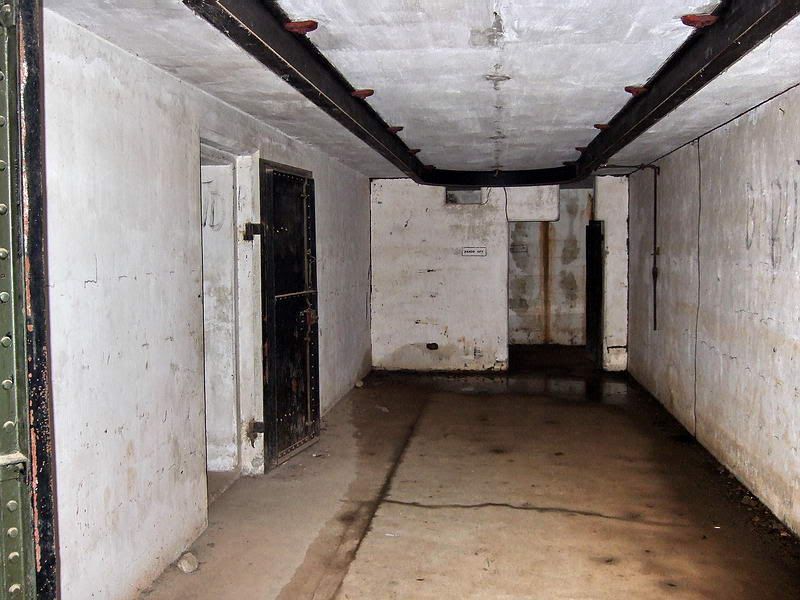
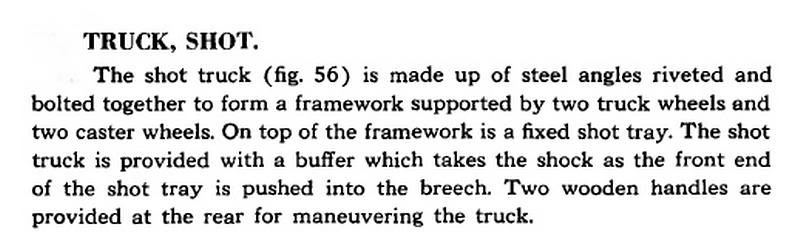
Here is an unlabeled photo of a battery shell room. The room is far too deep to be from Battery Way but I expect they all looked similar. Note the rail and winch system to move the shells. The rails still exist in many part of the this battery as you will soon see.
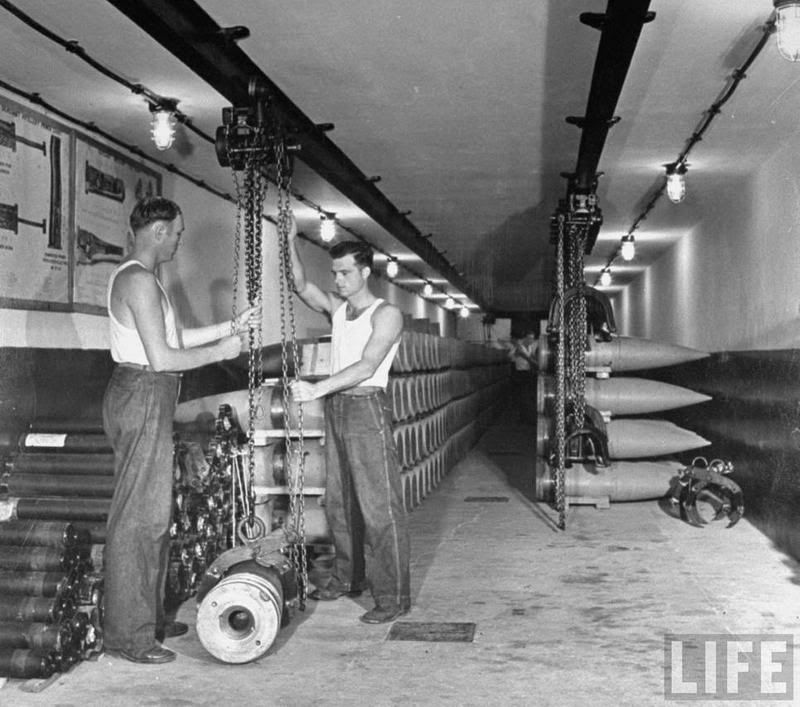
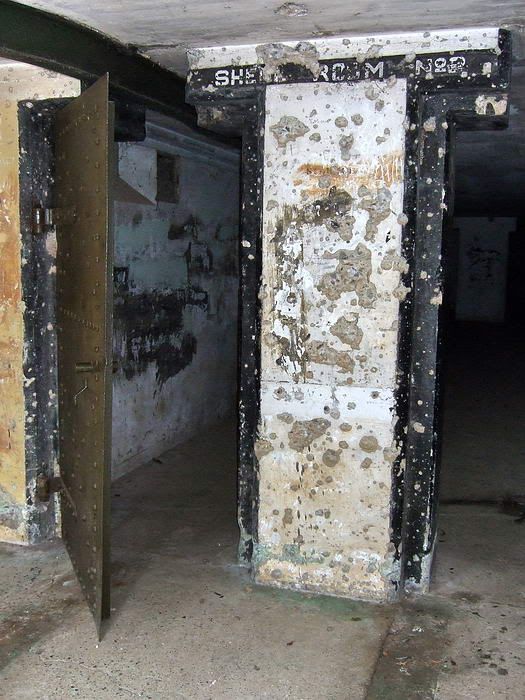
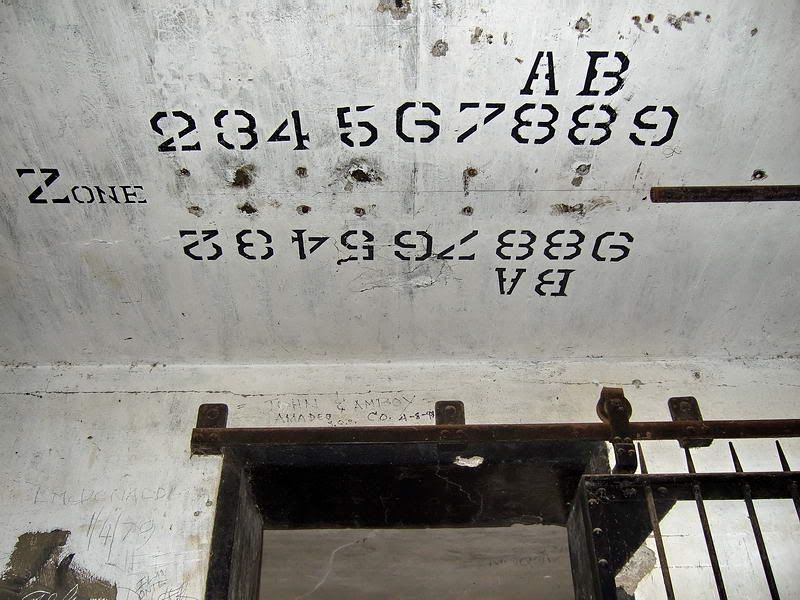
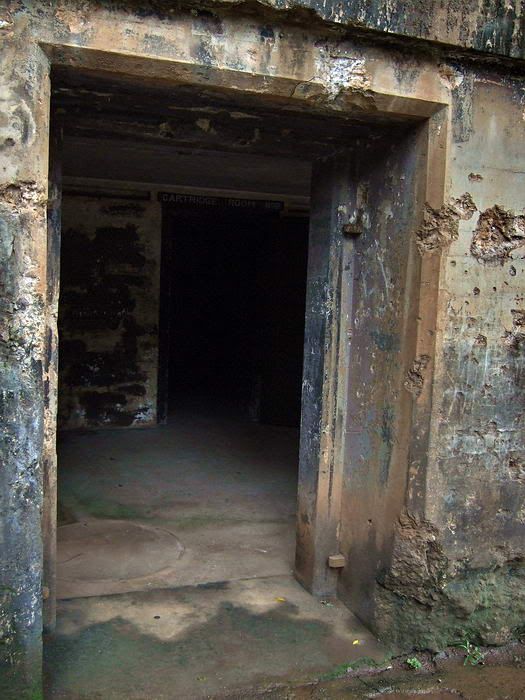
Another view of a shell room.
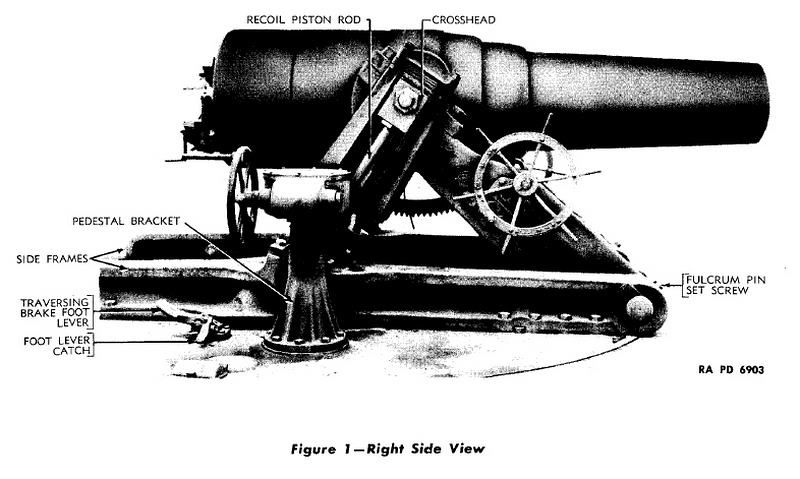
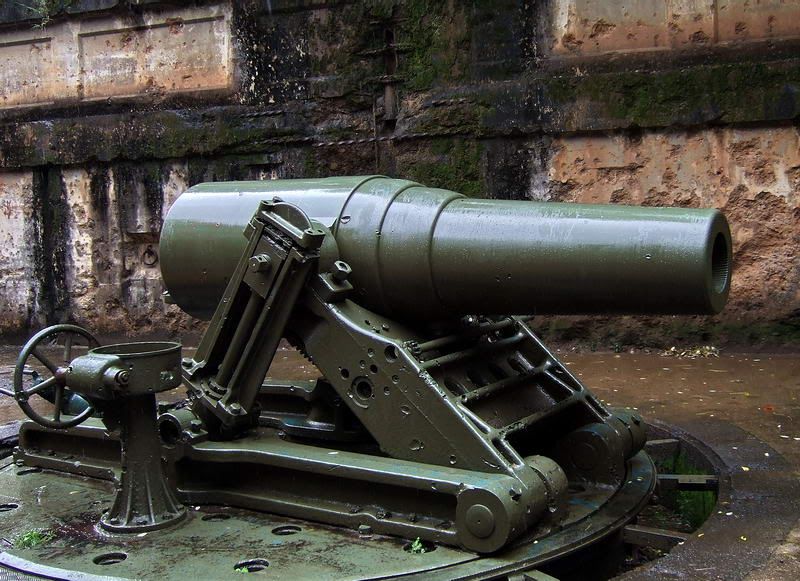
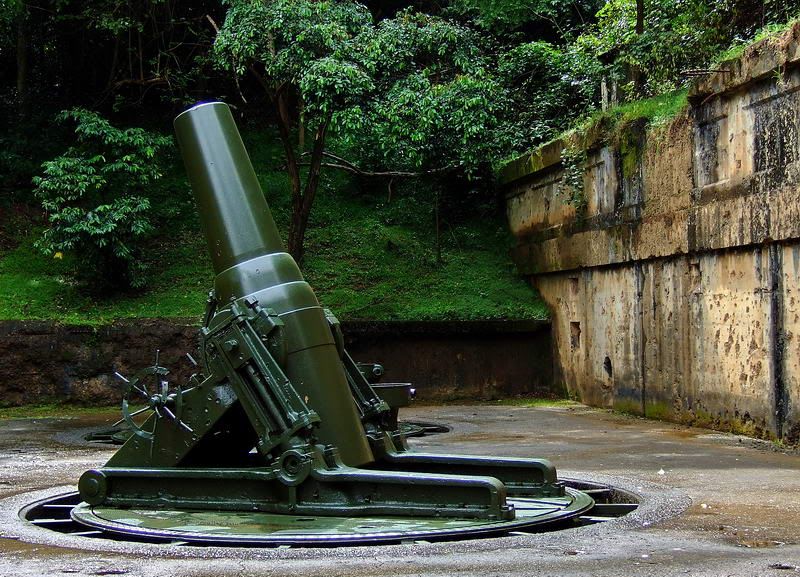
Mortar right side view
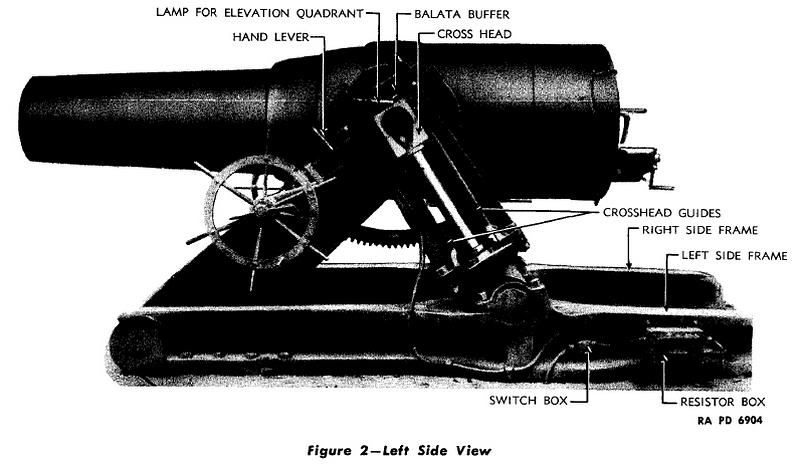
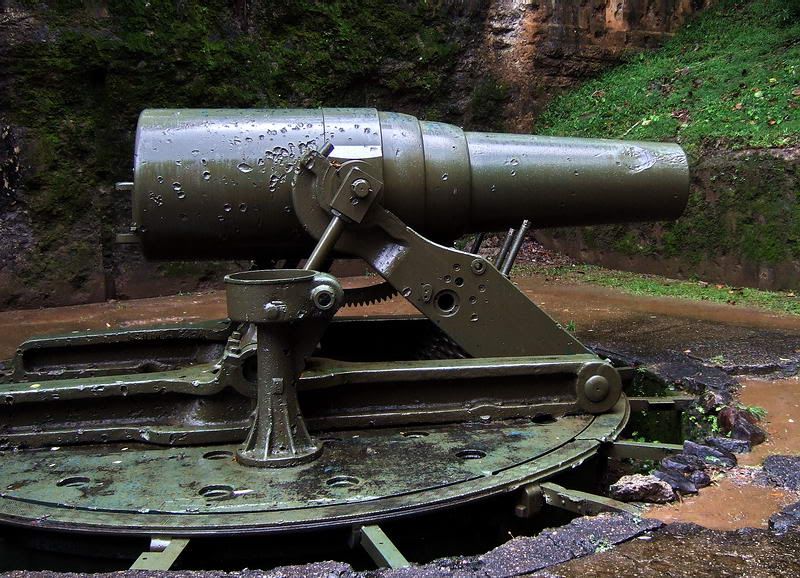
Mortar left side view
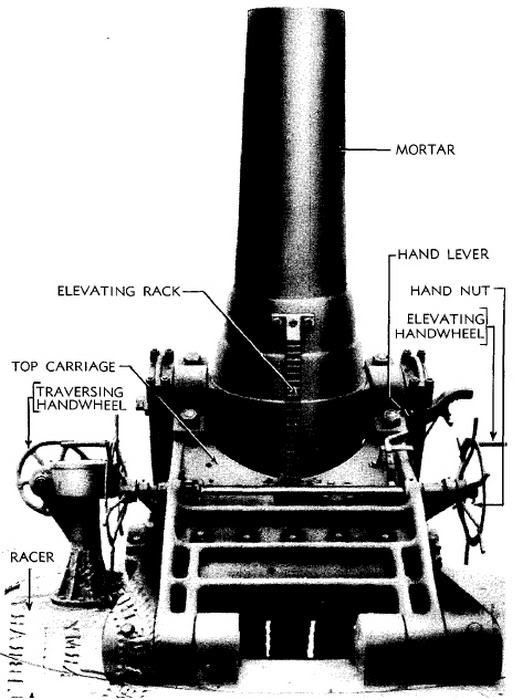
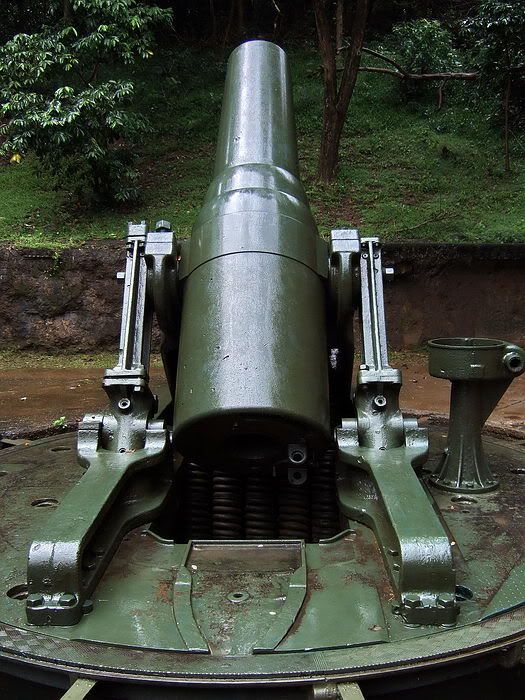
Mortar front view
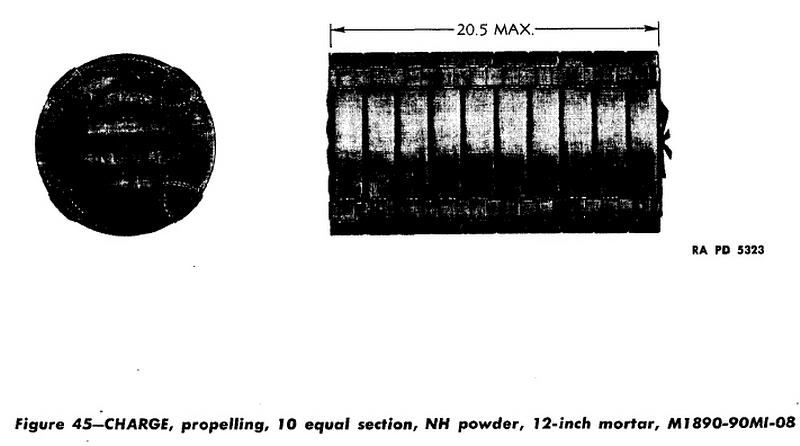
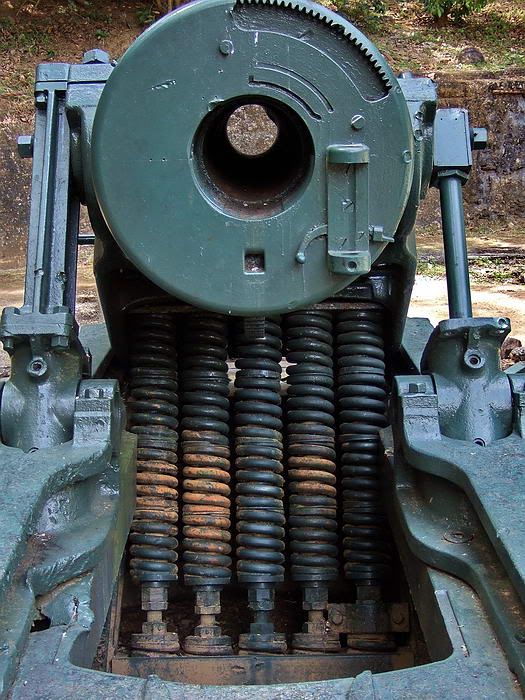
Powder charge view
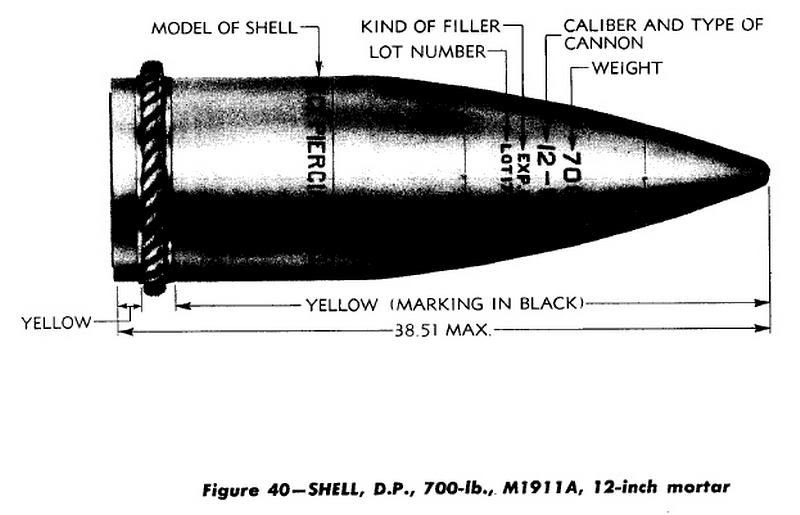
700 lb deck piercing shell
700 lb high explosive shell
1046 lb deck piercing shell
Mortar specs

Mortar specs (cont’d)
Look here for model views of Battery Way corregidor.org/chs_rowbotm/model.htm
Have you ever wondered what these mortars looked like when being loaded and fired? Here is a short video for you.
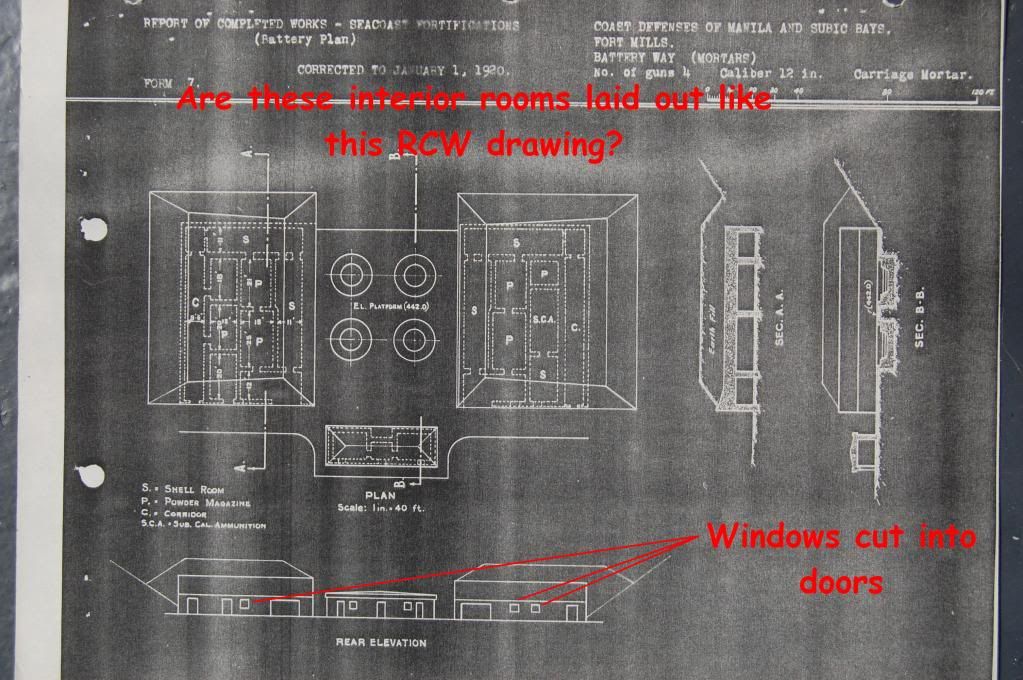
Configuration sketch of Battery Way
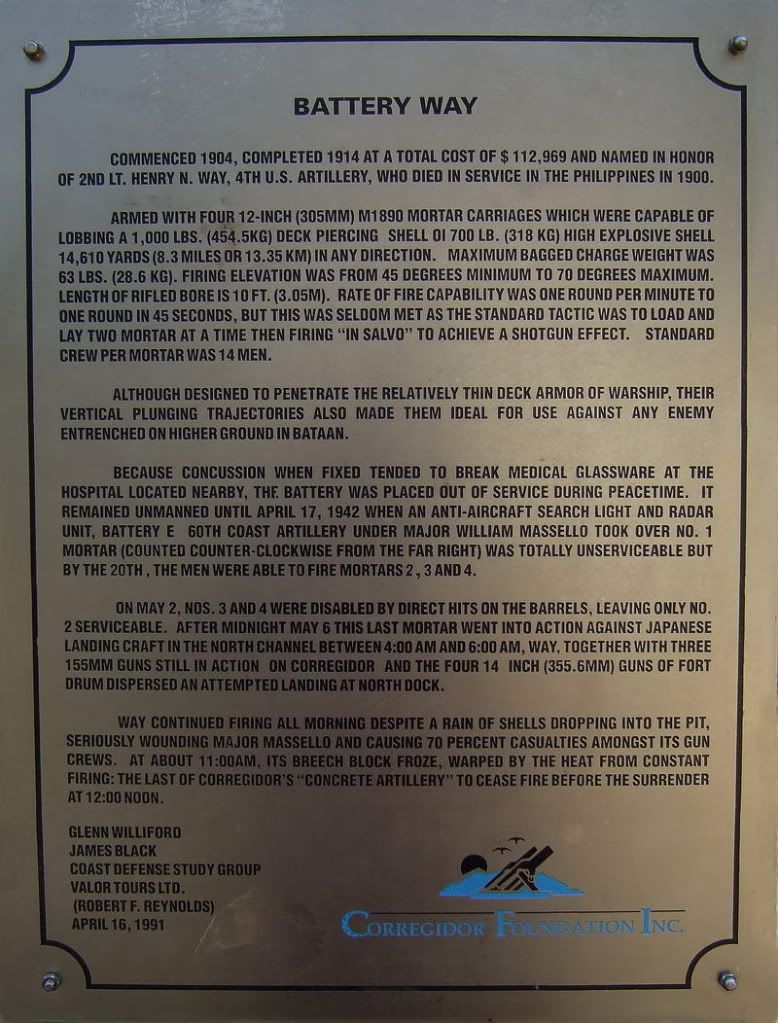
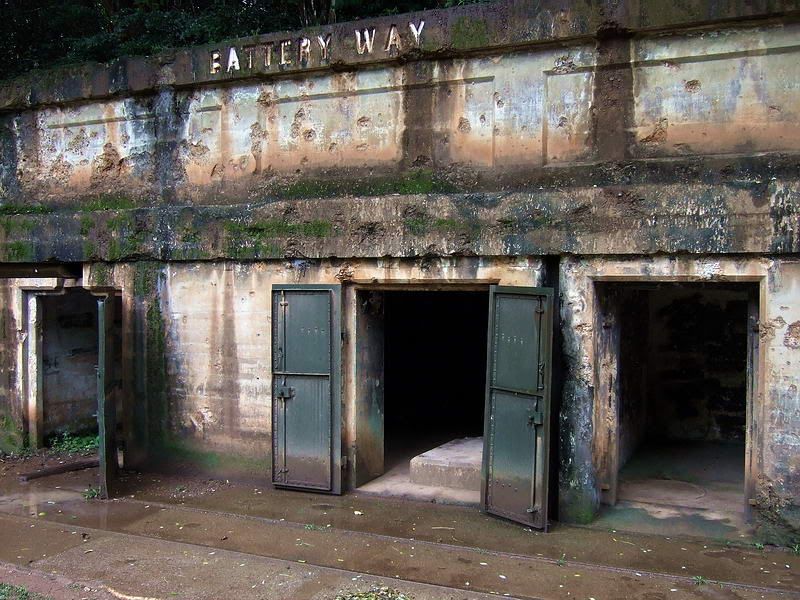
Wall plaque
Approaching Battery Way
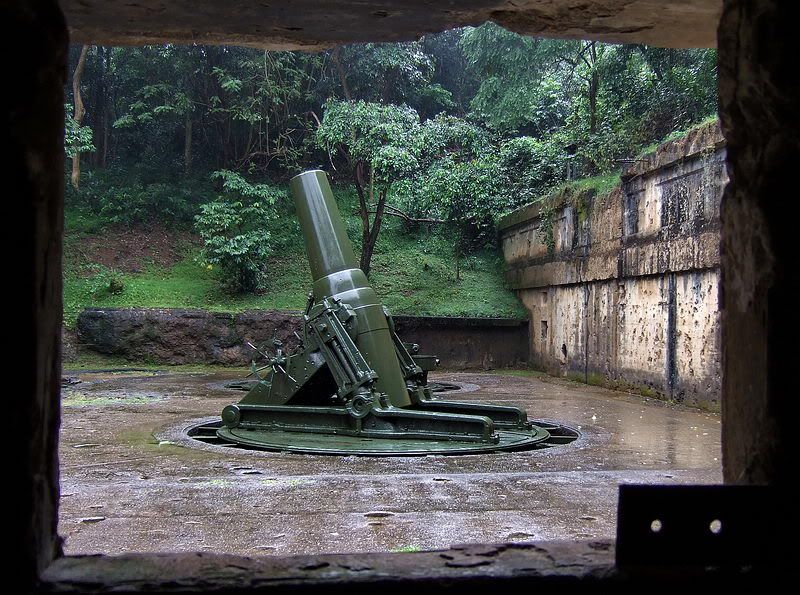
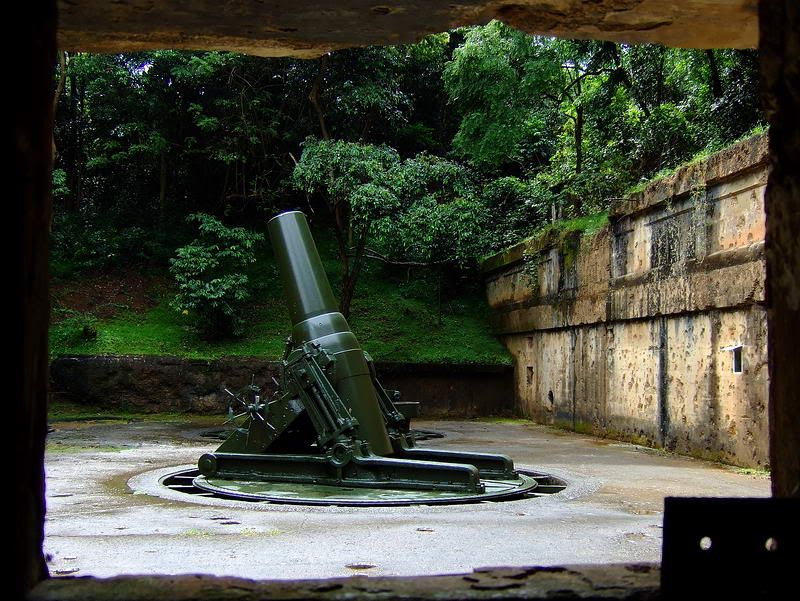
An early morning view into the gun pit
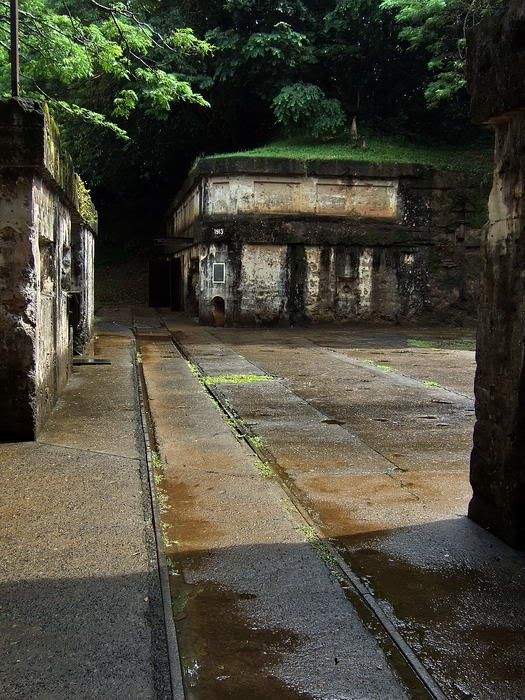
Rear of the Plotting and Communications building
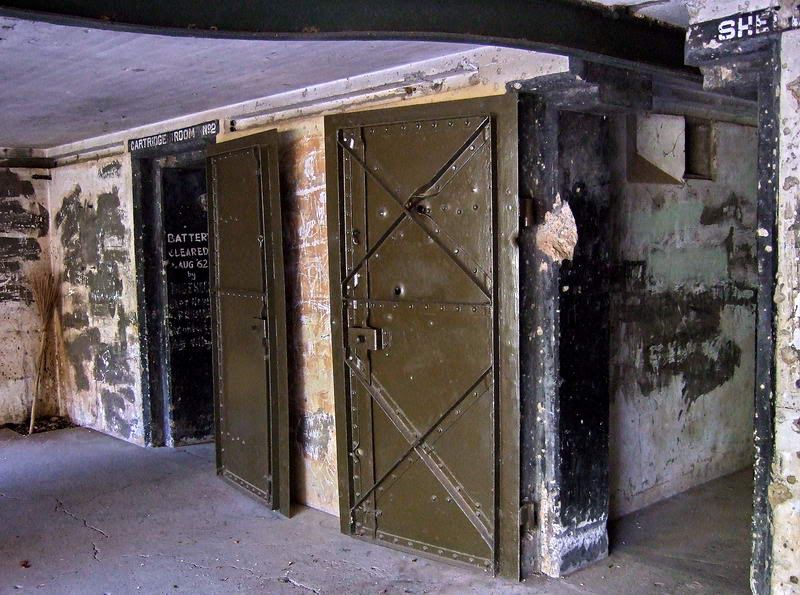
When viewed on the sketch, this would be the right side magazine
Left side magazine
From the right side magazine looking across the end of the gun pit towards the left side magazine. The Plotting and Communications building is to the left.
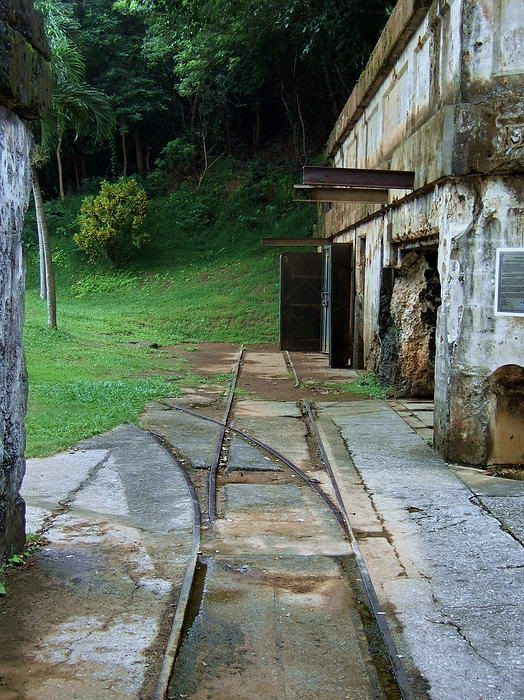
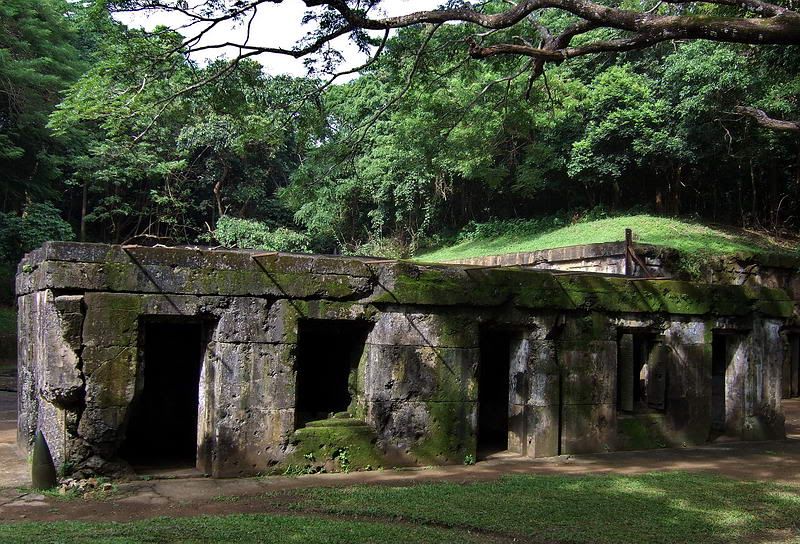
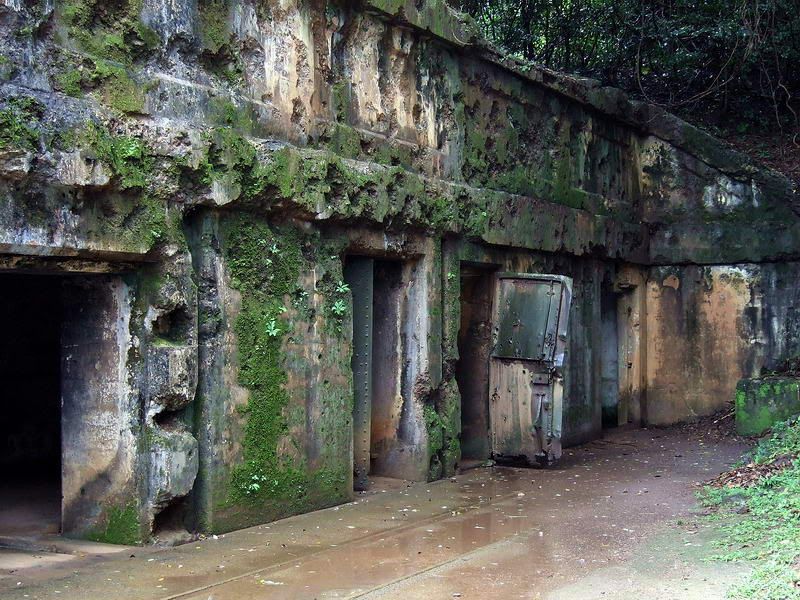
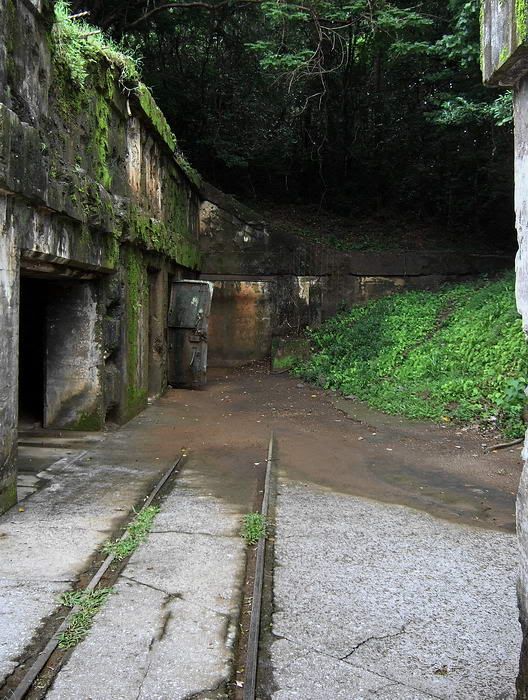
Front view of the left side magazine. The 3ft wide narrow gauge rail line passed in front of both magazines.
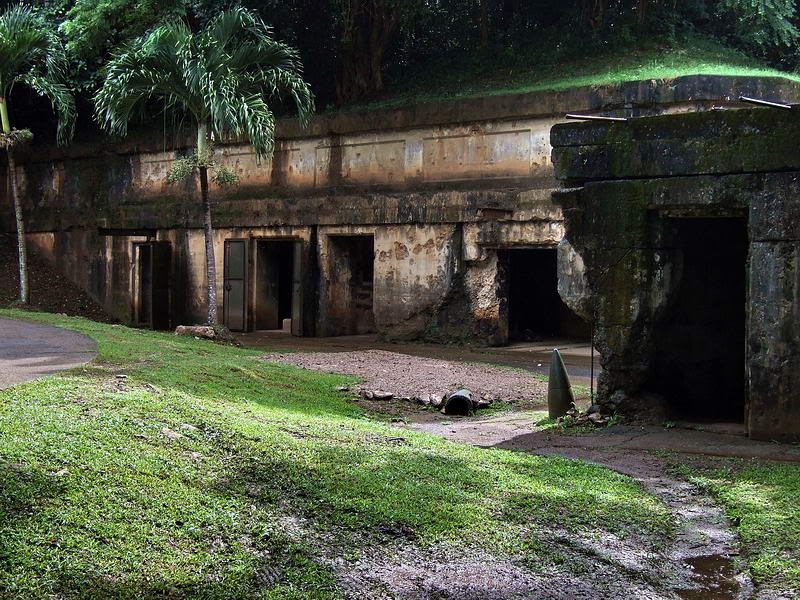
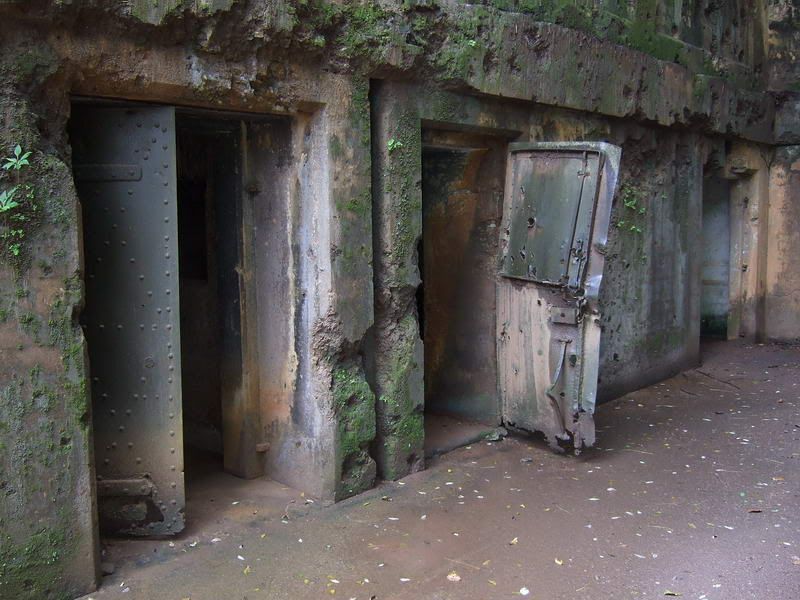
Front view of the right side magazine.
Right side magazine
Left side magazine
Note the rail in the ceiling for transporting the heavy shells

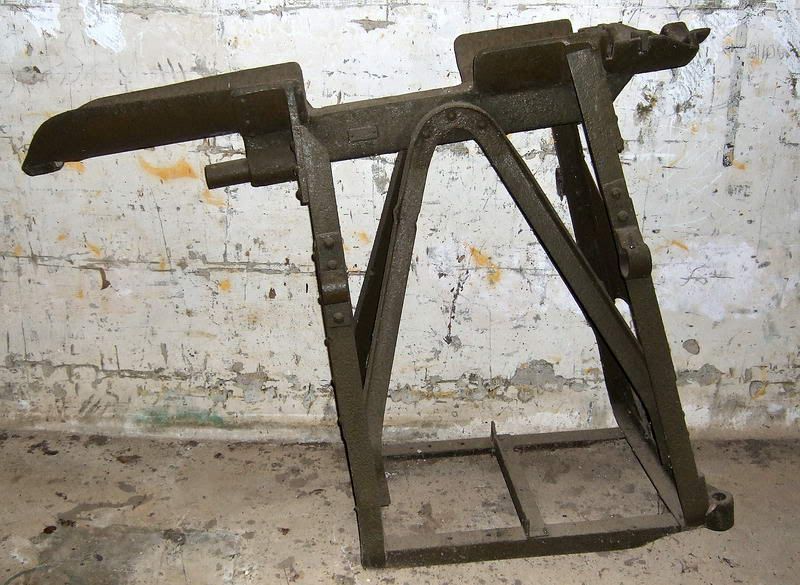
Frame for a shot truck.
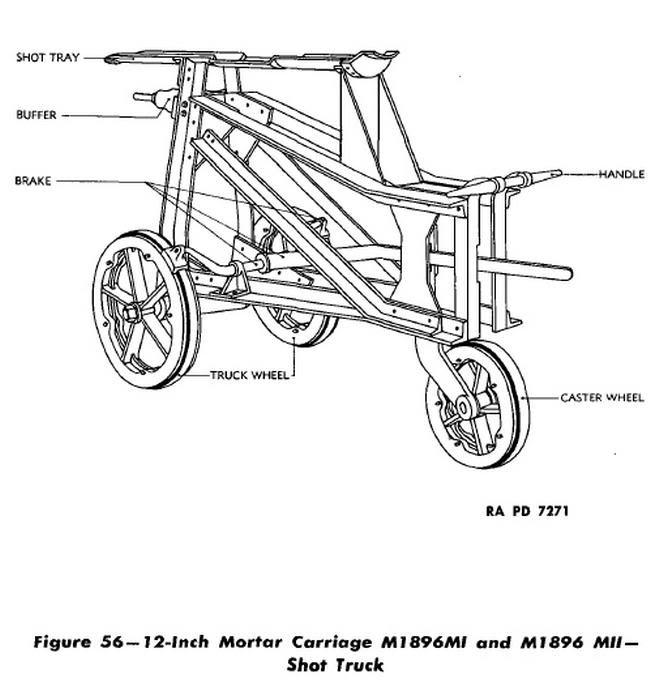
This is a little different model of shot truck but it has many similarities to the frame that remains in Battery Way. It has the top rounded shot tray and the buffer just below it.
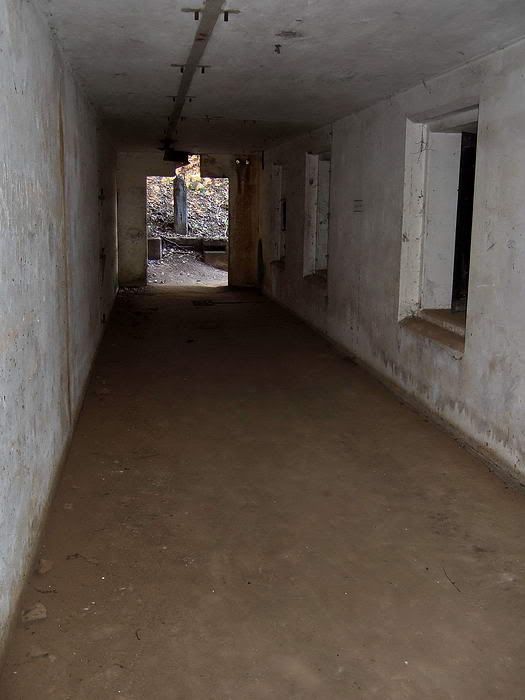
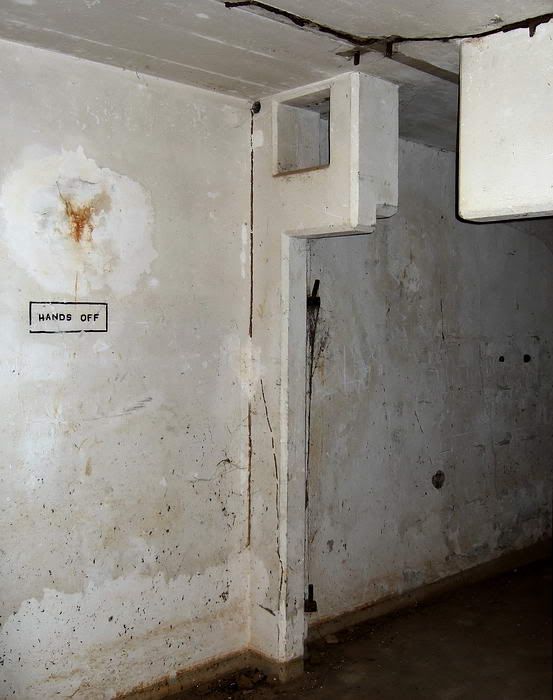
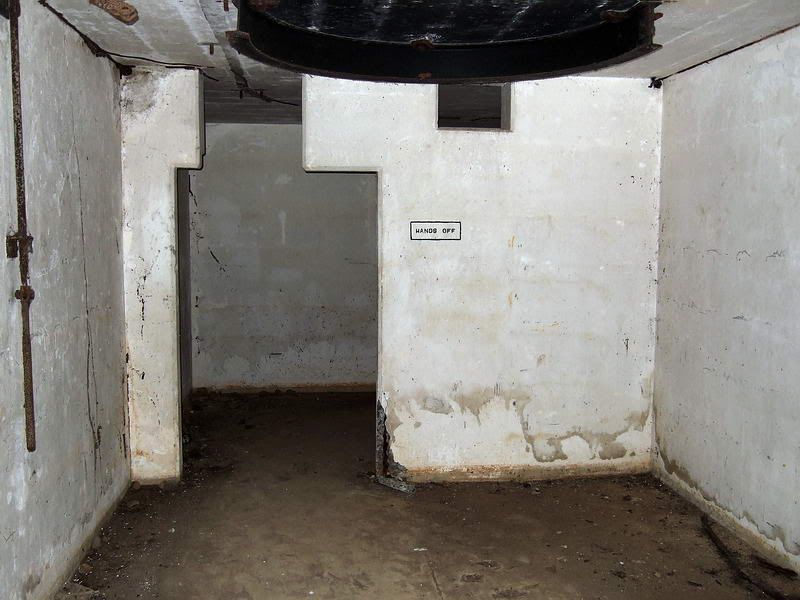
Corridor beside the sub caliber ammunition magazine which is to the right.
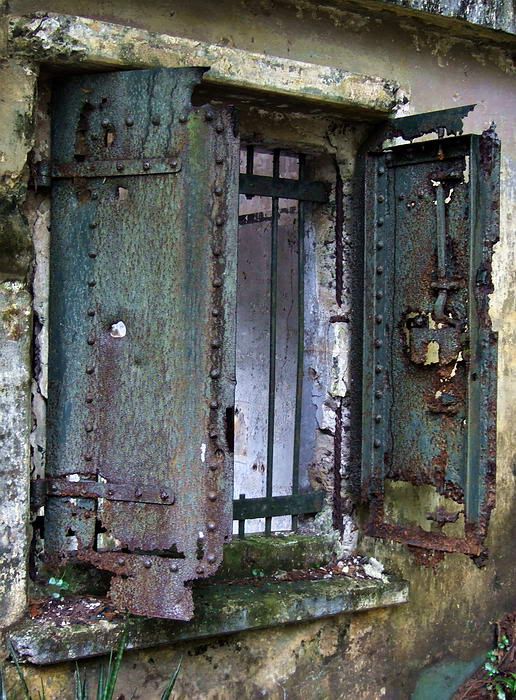
Windows of the sub caliber ammunition magazine
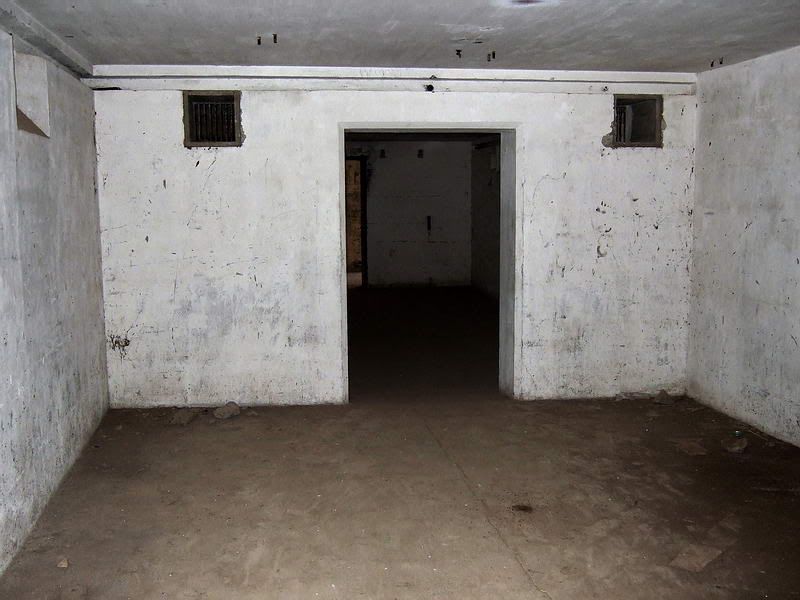
Doorway between rooms in the Plotting and Communications building
Rear window in the Plotting and Communications building
Rear window of the latrine.
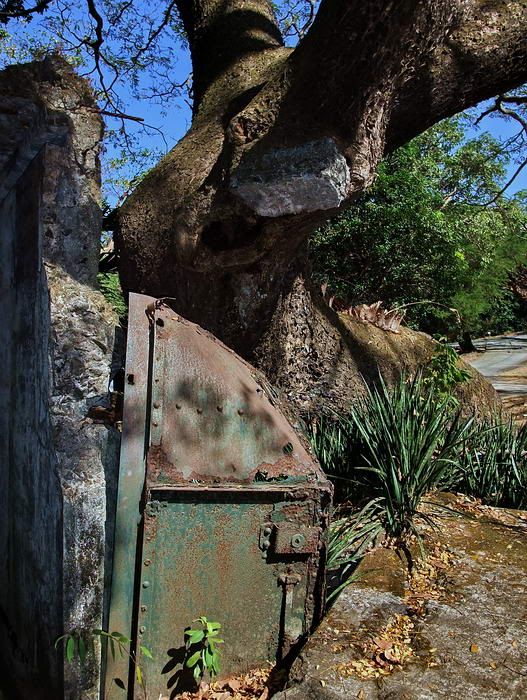
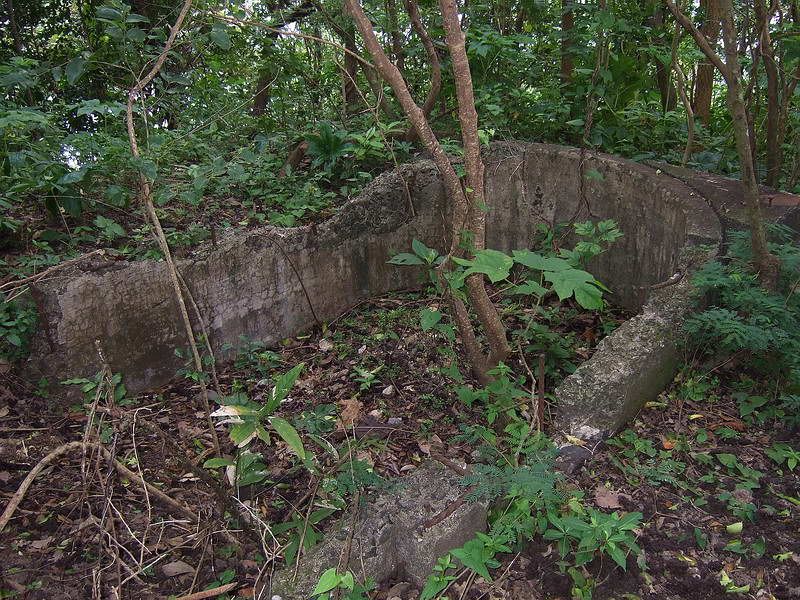
At the left of this photo is a destroyed wall of the latrine. When this wall exploded, a piece of concrete got lodged into the tree to the right. Over the years the tree has grown around the concrete so today it is firmly embedded there.

One of the air vents on top of the magazines
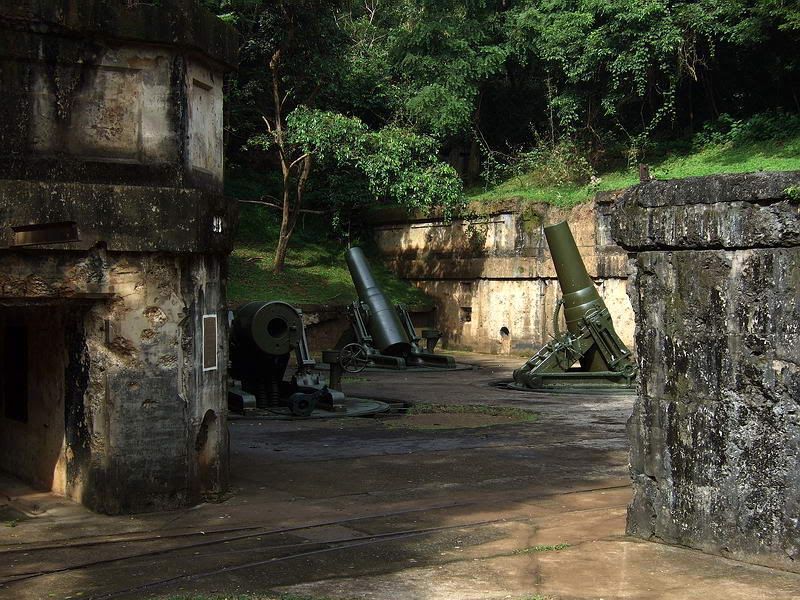
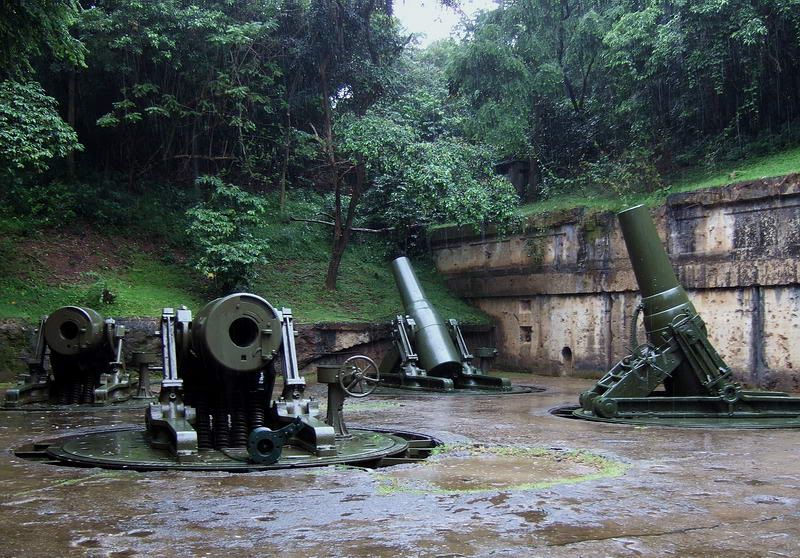
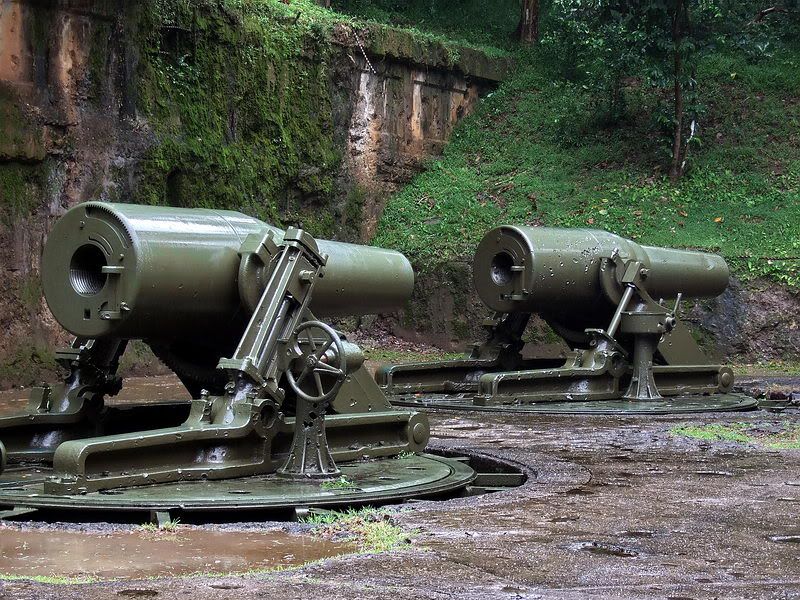
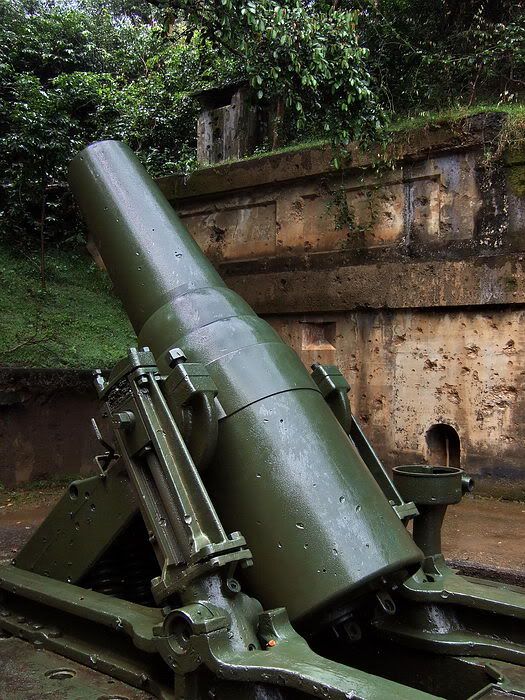
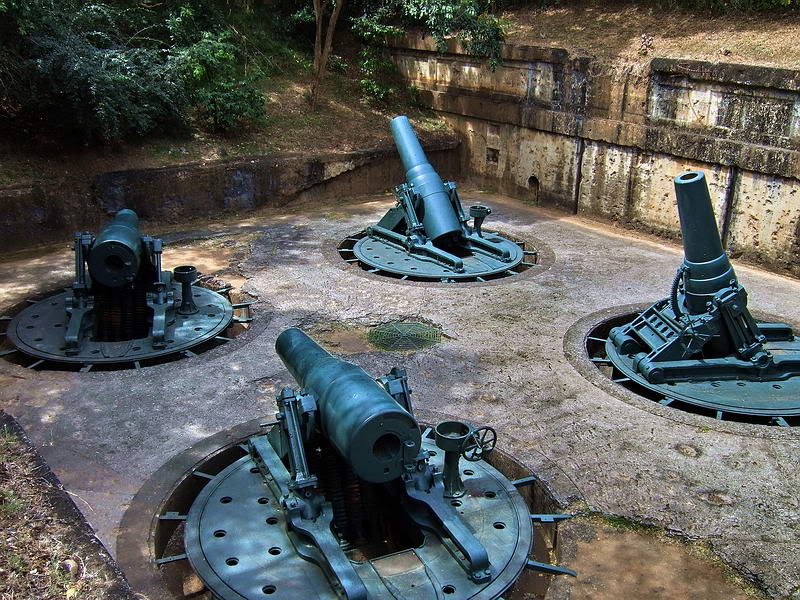
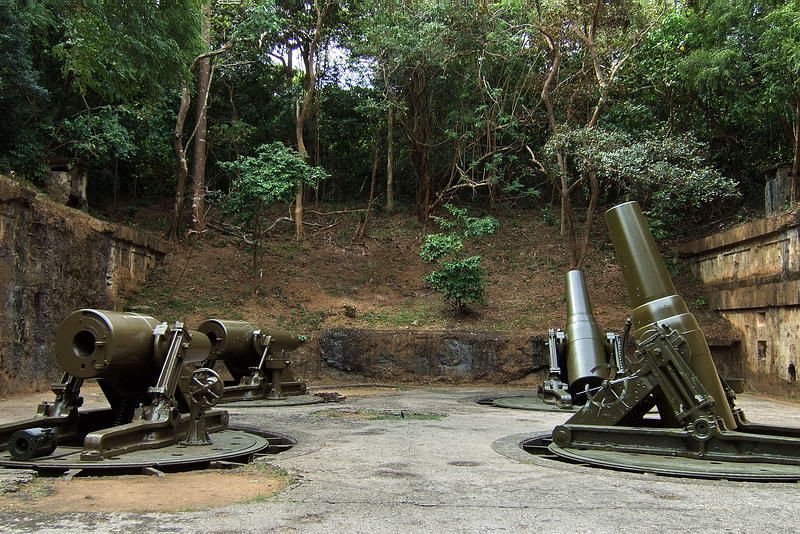
Here are various photos from the gun pit. After a shower last October was a great time to record how the mortars look today.
The Plotting and Communications rooms were behind the mortar pit but where was the Battery Control/Command Post? On the 1935 and 1936 maps I notice a number of locations which are labeled as being control stations for Batteries Way and Geary.
Military Map symbols and labeling are confusing. Here is a quick guide to the map labels quoted below:
B – Battery Command Post
BC - Battery Commander's Post
G – Gun Group Command Post
E – Emergency Command Post (w/o roof)
Postscript numbers:
I – Primary station
II – Secondary station
III – Supplementary station
IV – Second Supplementary station
Subscript numbers:
Unit number
There appears to have been a number of supplemental stations. Here is a sample of what they look like today.
The primary battery control station for Battery Way was on a hill a short distance to the west. It is labeled as B I 7 (Battery Control, Primary station, Unit #7). An emergency station labeled E I 7 is close to Rock Point.
B I 7. There are two stations at this location. The upper one was for Battery Way.
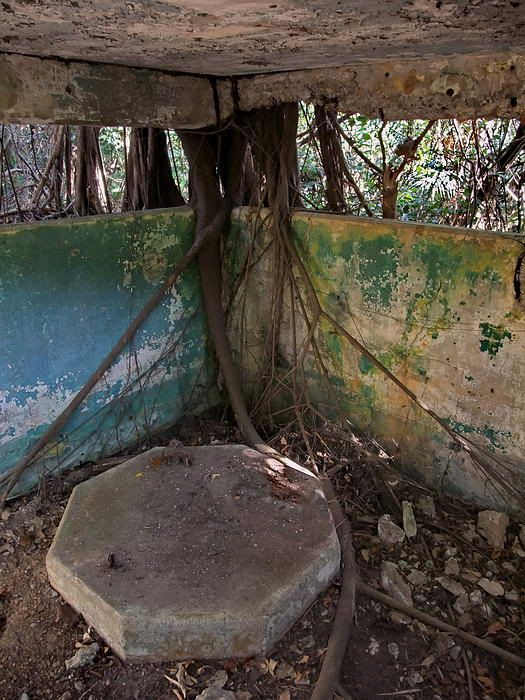
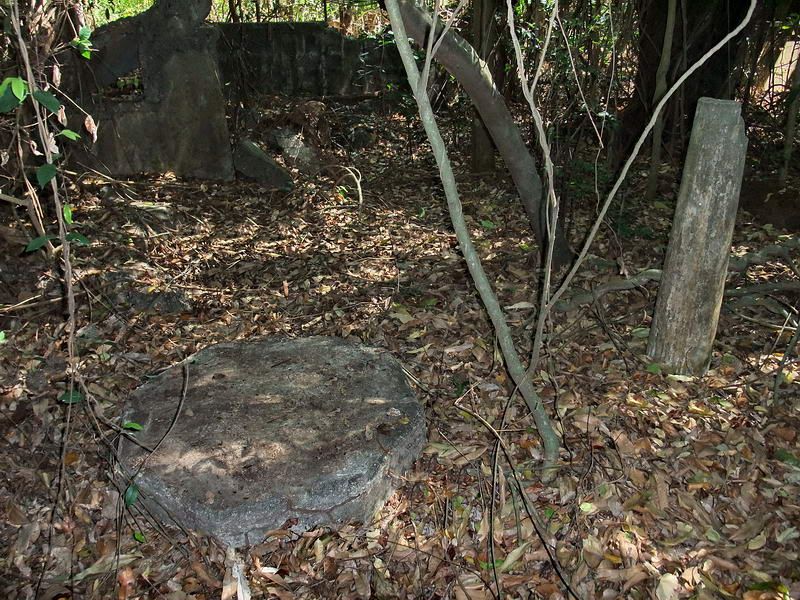
Viewing ports and a pedestal for the height and direction finding equipment.
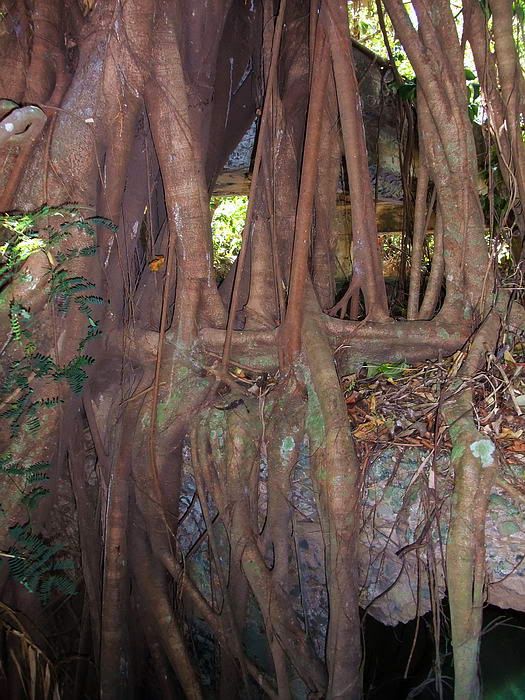
Outside corner view. Tree roots almost hide the upper and lower stations.
The secondary battery control station is located east of the Senior Officer’s Quarters on Topside and labeled as B II 7. On the 1935 map this is also designated as the Battery Commander’s station.
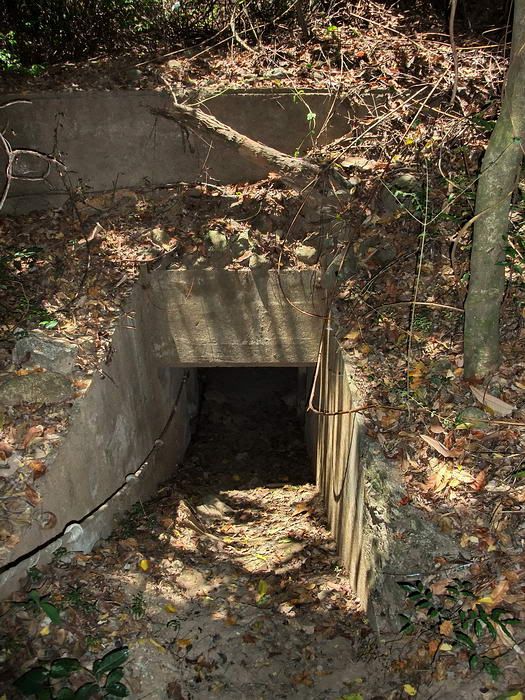
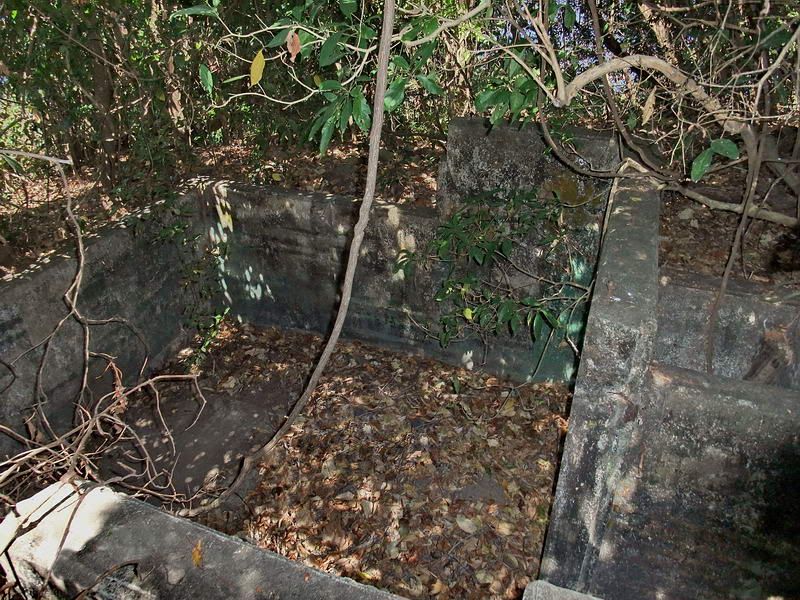
Looking down into the front entrance to B II 7

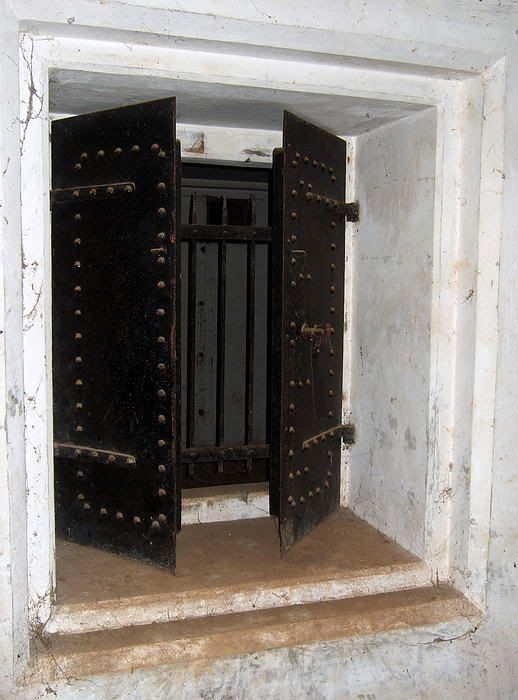
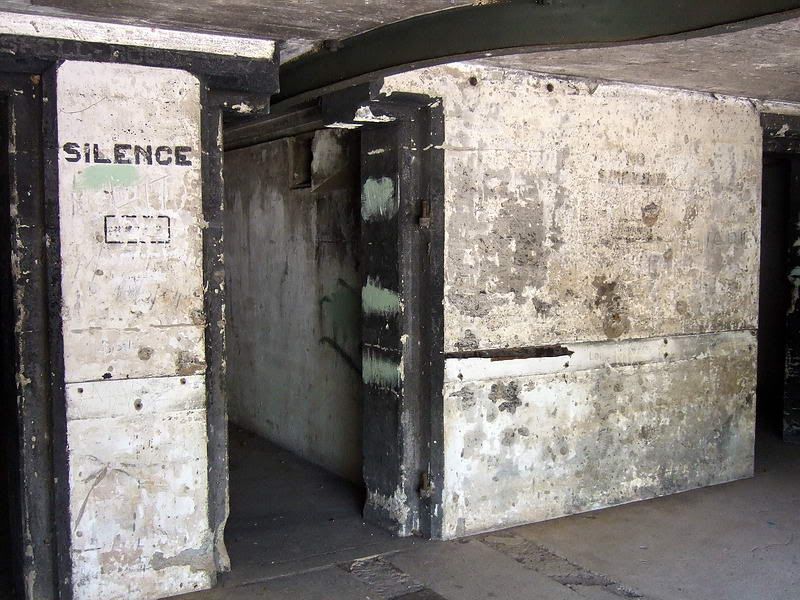
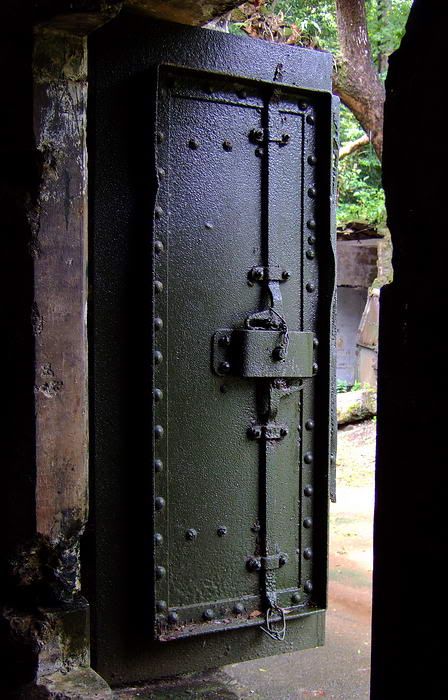
Interior rooms of B II 7 had sliding blast doors
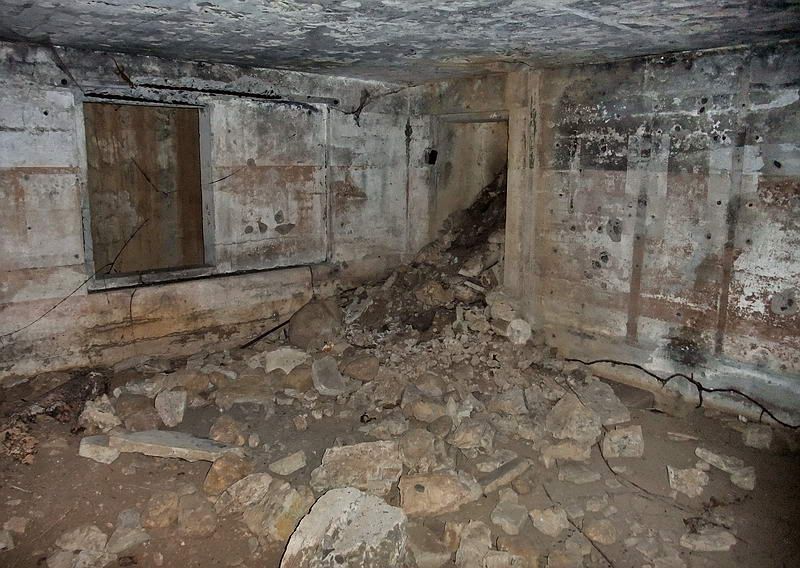
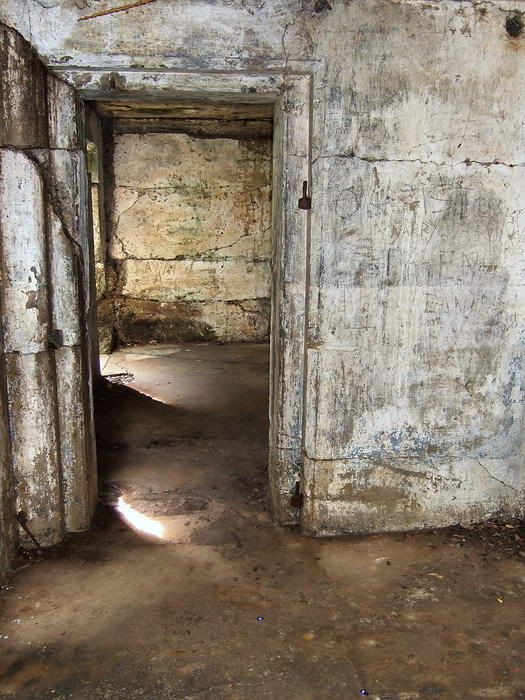
View of one of the rooms in B II 7 with the partially sealed rear doorway straight ahead
Nearby in front of Senior Officer’s Quarters 16-D is the emergency station labeled E II 7.
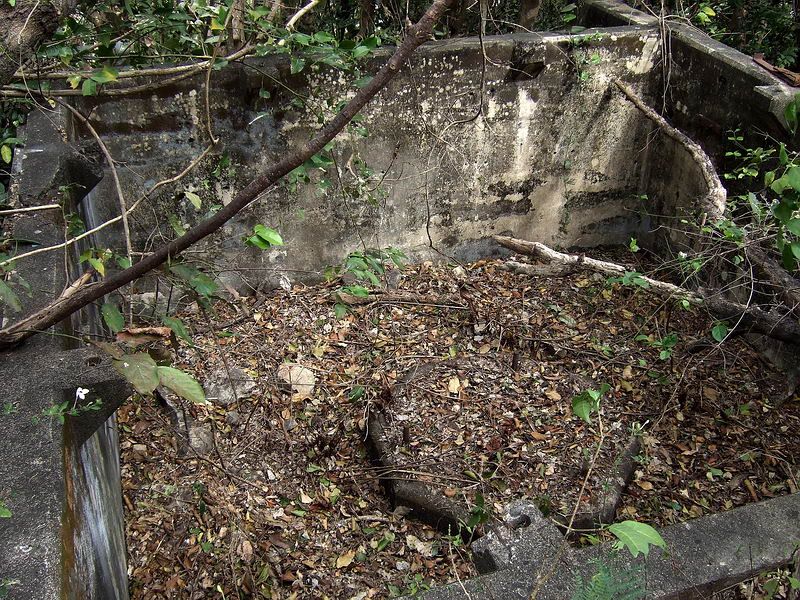
E II 7
One location is west of Battery Cheney above the cliffs. It is labeled G III 3.
G III 3
Close by is an emergency station EG III 3.
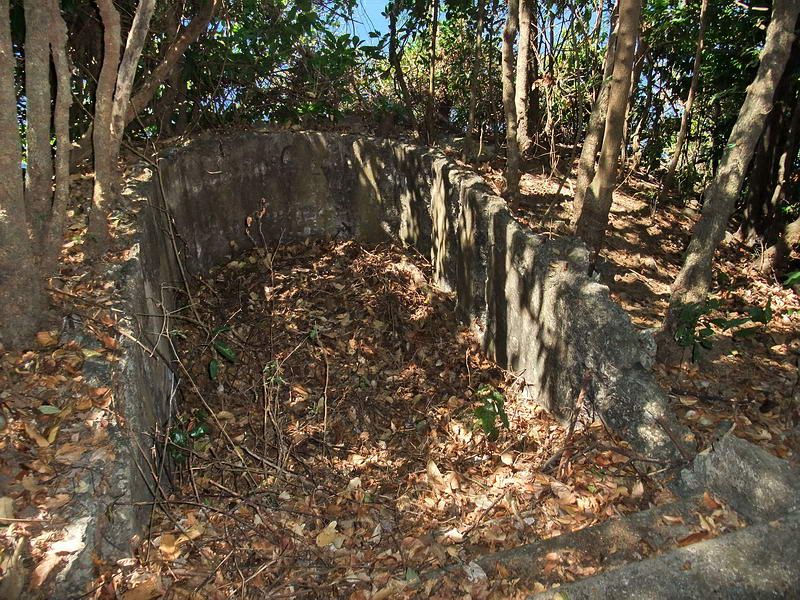
EG III 3. Although these emergency stations never had concrete roofs, I notice bolts sticking up at regular intervals which gives me the impression that they had wooden walls and roofs for weather protection. Due to their shape, many people call these structures “bathtubs”.
Another is on top of Malinta Hill and labeled as G IV 3.
G IV 3. Note the pedestal with mounting bolts to secure the height and direction finding equipment.
It also has an emergency station, EG IV 3, just a little bit further north.
EG IV 3
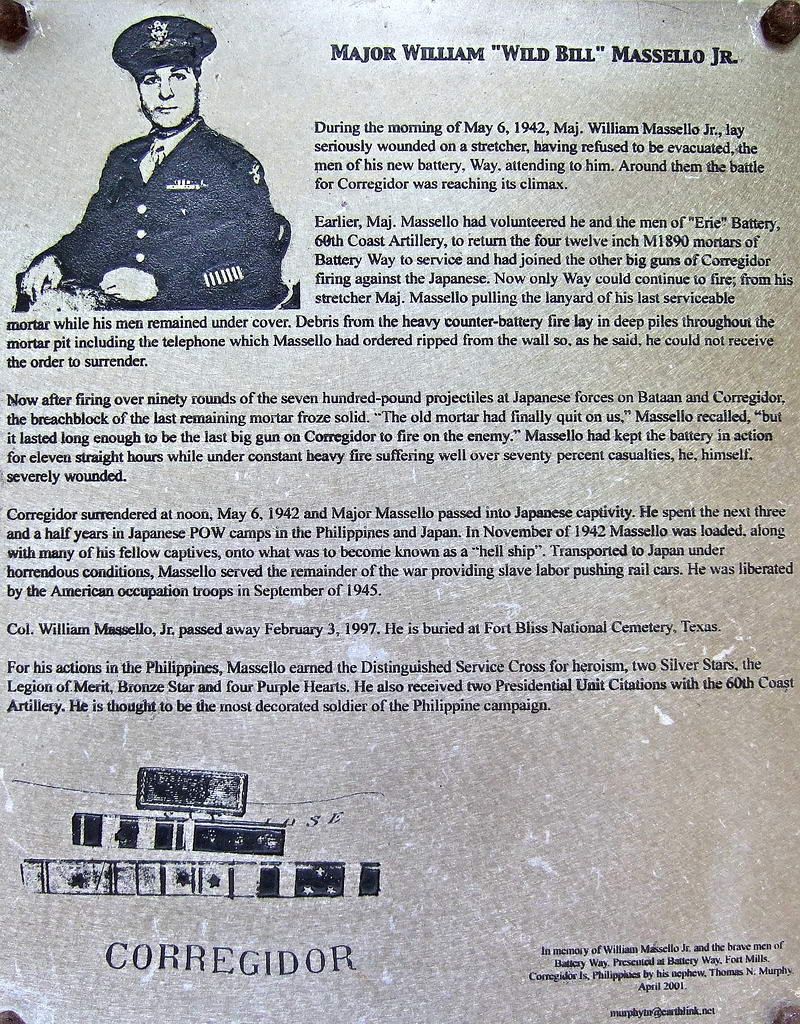
Plaque on the wall of the Plotting and Communications building commemorating Major Massello
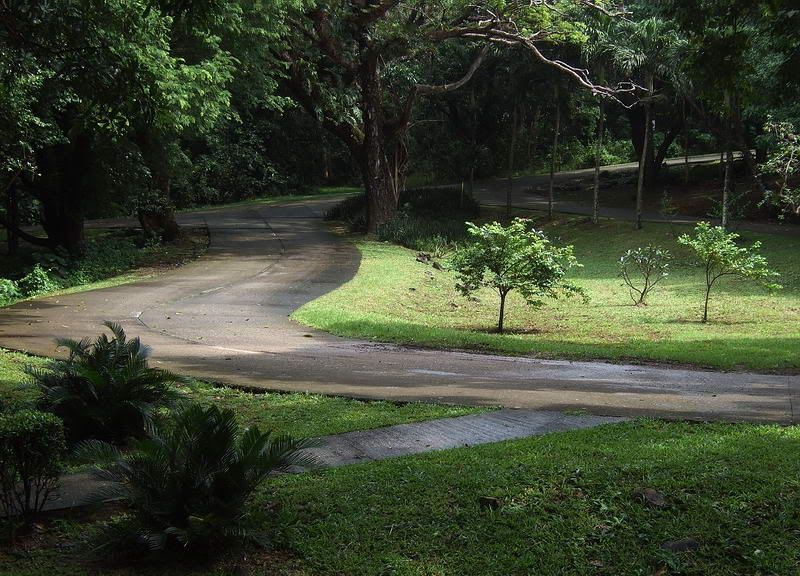
As you leave Battery Way, here is the view towards the main road between Middleside (to the left) and Topside (to the right).
I hope you enjoyed the trip. Report to MacArthur’s Café for a cold beer.
Considering all the pounding Battery Way received in WWII it is still quite intact. Exterior battle scars are everywhere but interior magazines and passageways are in very good condition.
Since Battery Way is on the day tour, the grounds are swept daily plus vegetation and garbage are kept in check. I hate to say it but I feel a slight artificial feeling to the place when comparing it to un-groomed locations.
I notice that the mortars have been painted a dark green in the last year or two. My photos were taken in different seasons and even different years so you will notice slight changes in the same scene. In the rainy season the battery has moss growing in many areas.
Detailed battery history is on Corregidor.org so I will not repeat it here.
A pre-war view of Battery Way’s gun pit.
Here is an unlabeled photo of a battery shell room. The room is far too deep to be from Battery Way but I expect they all looked similar. Note the rail and winch system to move the shells. The rails still exist in many part of the this battery as you will soon see.
Another view of a shell room.
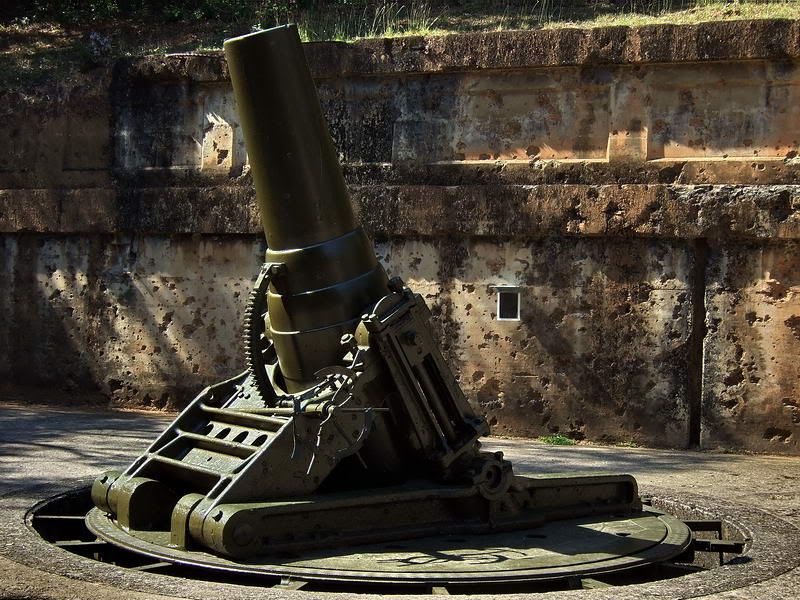
Mortar right side view
Mortar left side view
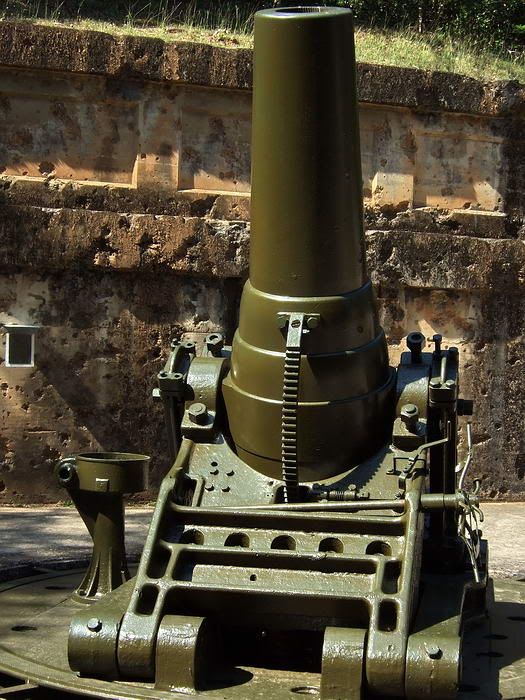
Mortar front view
Powder charge view
700 lb deck piercing shell
700 lb high explosive shell
1046 lb deck piercing shell
Mortar specs
Mortar specs (cont’d)
Look here for model views of Battery Way corregidor.org/chs_rowbotm/model.htm
Have you ever wondered what these mortars looked like when being loaded and fired? Here is a short video for you.
Configuration sketch of Battery Way
Wall plaque
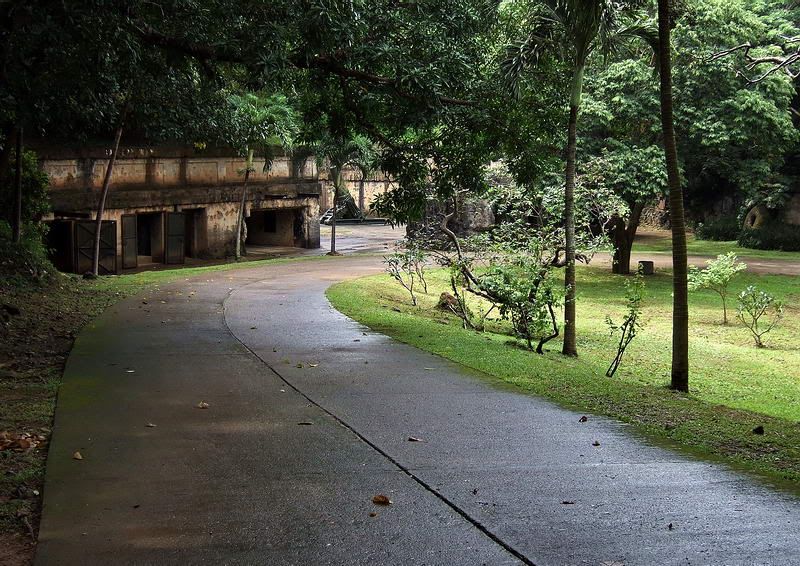
Approaching Battery Way
An early morning view into the gun pit
Rear of the Plotting and Communications building
When viewed on the sketch, this would be the right side magazine
Left side magazine
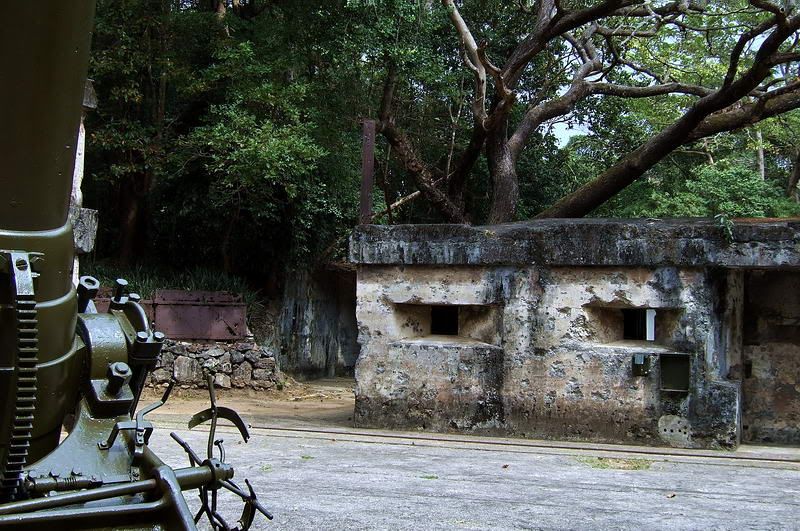
From the right side magazine looking across the end of the gun pit towards the left side magazine. The Plotting and Communications building is to the left.
Front view of the left side magazine. The 3ft wide narrow gauge rail line passed in front of both magazines.
Front view of the right side magazine.
Right side magazine
Left side magazine
Note the rail in the ceiling for transporting the heavy shells
Frame for a shot truck.
This is a little different model of shot truck but it has many similarities to the frame that remains in Battery Way. It has the top rounded shot tray and the buffer just below it.
Corridor beside the sub caliber ammunition magazine which is to the right.
Windows of the sub caliber ammunition magazine
Doorway between rooms in the Plotting and Communications building
Rear window in the Plotting and Communications building
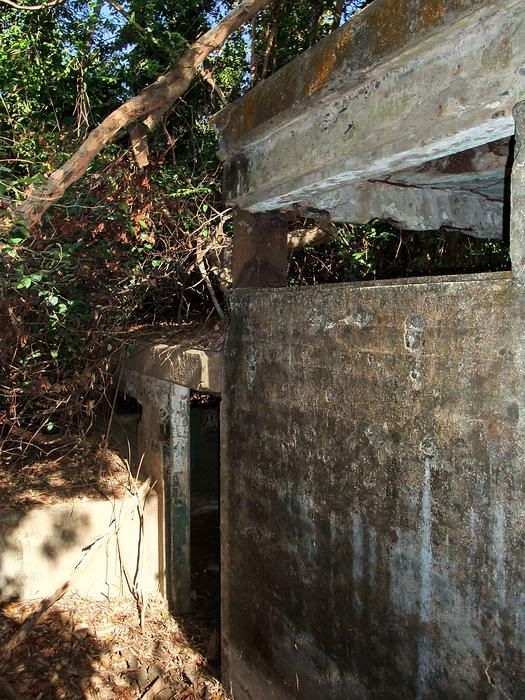
Rear window of the latrine.
At the left of this photo is a destroyed wall of the latrine. When this wall exploded, a piece of concrete got lodged into the tree to the right. Over the years the tree has grown around the concrete so today it is firmly embedded there.
One of the air vents on top of the magazines
Here are various photos from the gun pit. After a shower last October was a great time to record how the mortars look today.
The Plotting and Communications rooms were behind the mortar pit but where was the Battery Control/Command Post? On the 1935 and 1936 maps I notice a number of locations which are labeled as being control stations for Batteries Way and Geary.
Military Map symbols and labeling are confusing. Here is a quick guide to the map labels quoted below:
B – Battery Command Post
BC - Battery Commander's Post
G – Gun Group Command Post
E – Emergency Command Post (w/o roof)
Postscript numbers:
I – Primary station
II – Secondary station
III – Supplementary station
IV – Second Supplementary station
Subscript numbers:
Unit number
There appears to have been a number of supplemental stations. Here is a sample of what they look like today.
The primary battery control station for Battery Way was on a hill a short distance to the west. It is labeled as B I 7 (Battery Control, Primary station, Unit #7). An emergency station labeled E I 7 is close to Rock Point.
B I 7. There are two stations at this location. The upper one was for Battery Way.
Viewing ports and a pedestal for the height and direction finding equipment.
Outside corner view. Tree roots almost hide the upper and lower stations.
The secondary battery control station is located east of the Senior Officer’s Quarters on Topside and labeled as B II 7. On the 1935 map this is also designated as the Battery Commander’s station.
Looking down into the front entrance to B II 7
Interior rooms of B II 7 had sliding blast doors
View of one of the rooms in B II 7 with the partially sealed rear doorway straight ahead
Nearby in front of Senior Officer’s Quarters 16-D is the emergency station labeled E II 7.
E II 7
One location is west of Battery Cheney above the cliffs. It is labeled G III 3.
G III 3
Close by is an emergency station EG III 3.
EG III 3. Although these emergency stations never had concrete roofs, I notice bolts sticking up at regular intervals which gives me the impression that they had wooden walls and roofs for weather protection. Due to their shape, many people call these structures “bathtubs”.
Another is on top of Malinta Hill and labeled as G IV 3.
G IV 3. Note the pedestal with mounting bolts to secure the height and direction finding equipment.
It also has an emergency station, EG IV 3, just a little bit further north.
EG IV 3
Plaque on the wall of the Plotting and Communications building commemorating Major Massello
As you leave Battery Way, here is the view towards the main road between Middleside (to the left) and Topside (to the right).
I hope you enjoyed the trip. Report to MacArthur’s Café for a cold beer.


 That effect is just icing on the cake.