


Post by fots2 on Apr 8, 2010 22:30:18 GMT 8
James Ravine on Corregidor’s north coast is a treasure trove of interesting places to visit. You will certainly get some exercise wandering around this ravine and immediate area. Most times I have been down there I am the only person in sight.
Battle reports from 1945 detail the efforts to drive the Japanese from this area. The ground fighting was extensive and required the support of offshore Navy destroyers and the Air Force dropping bombs and napalm. By the time the battle was over, nineteen tunnels in the ravine had been sealed however many still exist today. This is the place where I once found a human bone.
Thanks to armyjunk and batteryboy for information and drawings that helped with locating some structures that I wanted to photograph. I found everything new on my list and also visited some previous locations I had explored before.
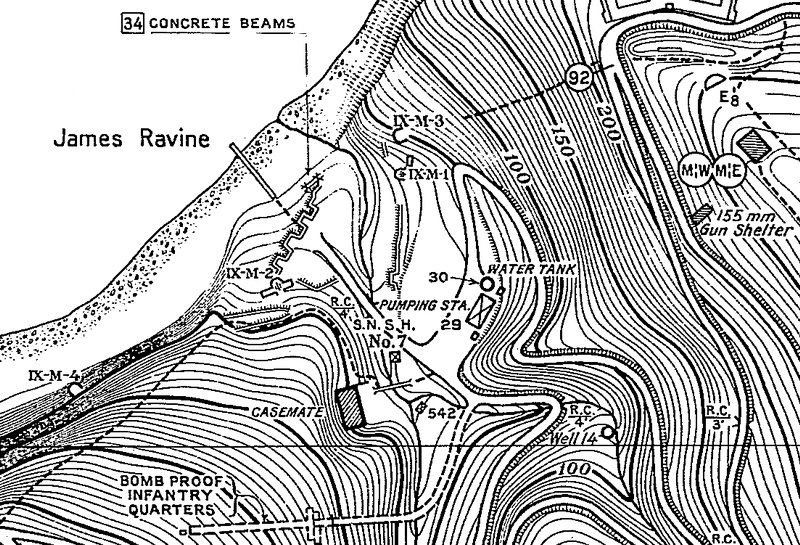
Map of James Ravine.
The easiest way to James Ravine is to get a ride to Middleside and head north from there. An old road down into the ravine is quite good walking due to there being a water pumping station still in operation. It is located near the bottom of the ravine and runs on an ‘as needed’ basis.
In addition to my photo goals for today, I thought I would also show you a few of the sights along the way.
For most of the trek from Middleside, the terrain is a gentle slope downwards. Just past a 155mm gun shelter, you come to an intersection so turn left. From here to the bottom, the road is a fairly steep zig zag along the eastern wall of the ravine down to the pumping station.
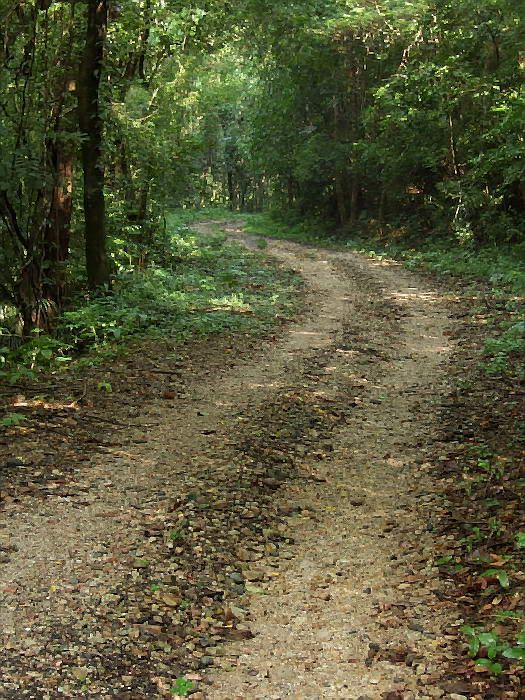
A section of the road between Middleside and the 155mm gun shelter.
155mm gun shelter
At a sharp switchback in the road is a small concrete machine gun position facing downhill. Inside is a pedestal with a bolt which I assume is for mounting the gun.
Looking in the side doorway of the machine gun position.
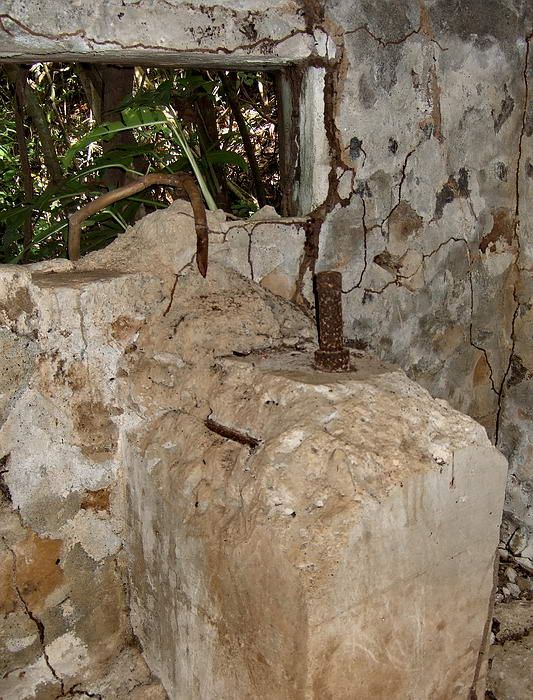
The pedestal and bolt inside the window facing down the ravine.
An enemy’s view of approaching the position. Hopefully he would never have gotten this close.
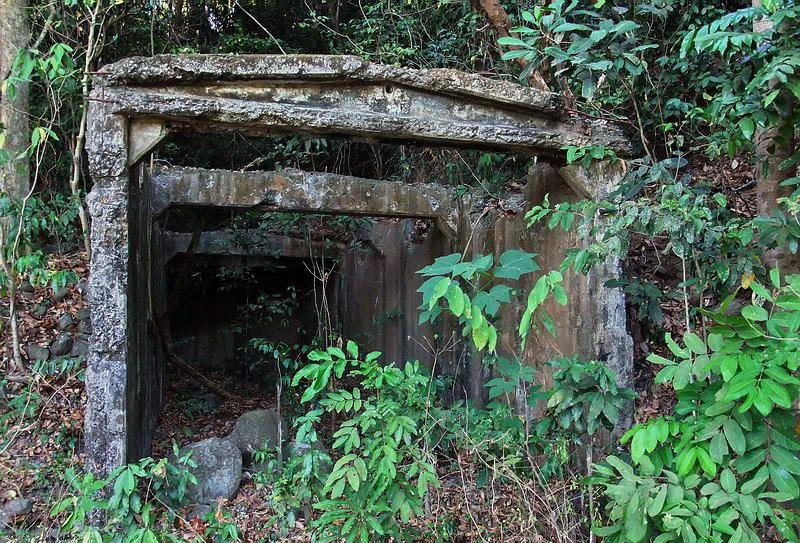
Soon you will come to the pumping station which is 35 to 40 feet in elevation above the rocky beach. It consists of a diesel and pump building and a guard shack. This shack is only occupied when someone is working there.
Guard shack.
Early morning view along the coast taken from the guard shack.
As I mentioned earlier, wandering around James Ravine does require some effort especially if you get away from the few paths there. It is heavily overgrown with a thick canopy above you. Up from the beach itself, it is not as thick but then there is the steep slope to deal with. Exploring is hot, rough, strenuous and probably a bit dangerous but I find it one of the most interesting places on the whole island.
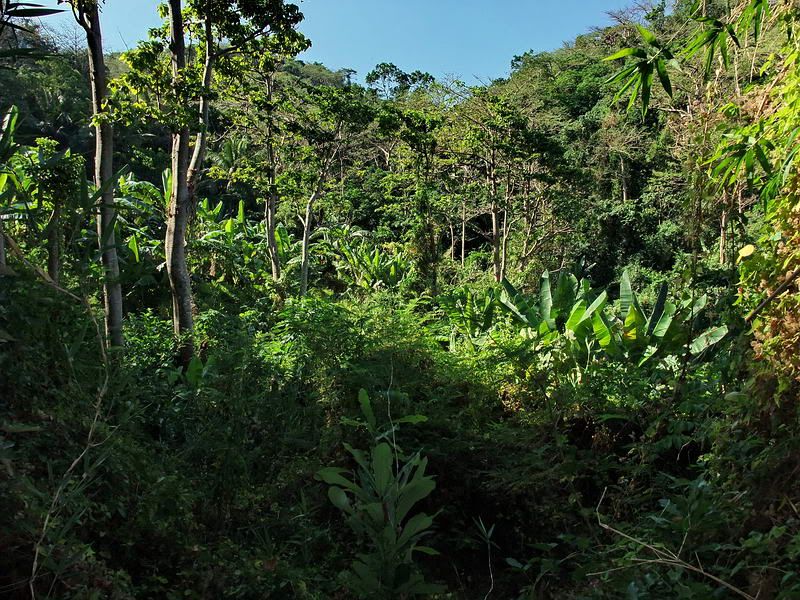
View back up James Ravine taken from near the guard shack.
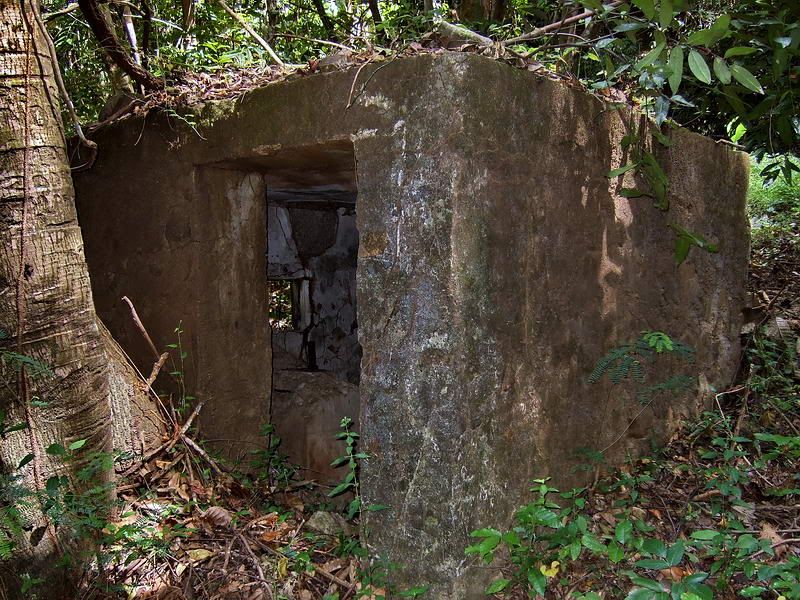
Beside the pump building is the ruins of a large concrete water tank.
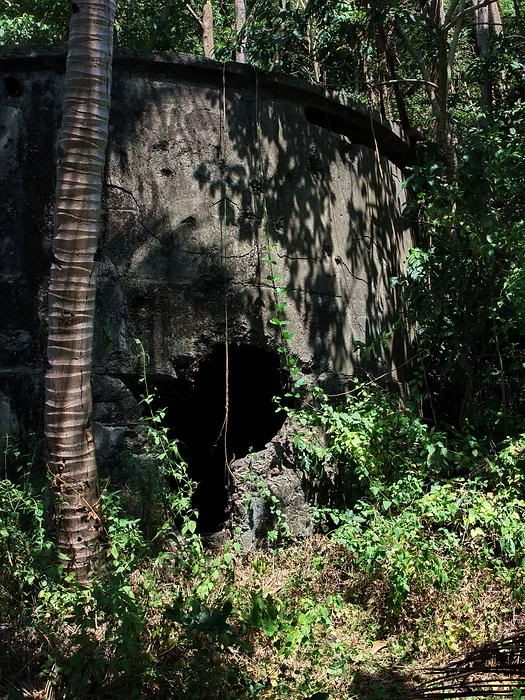
Destroyed water tank.
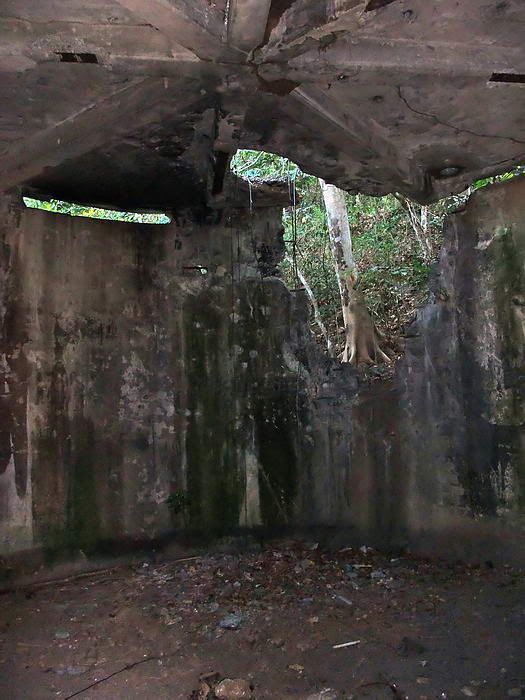
Interior view of the tank.
The road ends here but two paths continue, one leading toward the beach. Three Philippine Scouts tombstones are still lying beside the upper path.
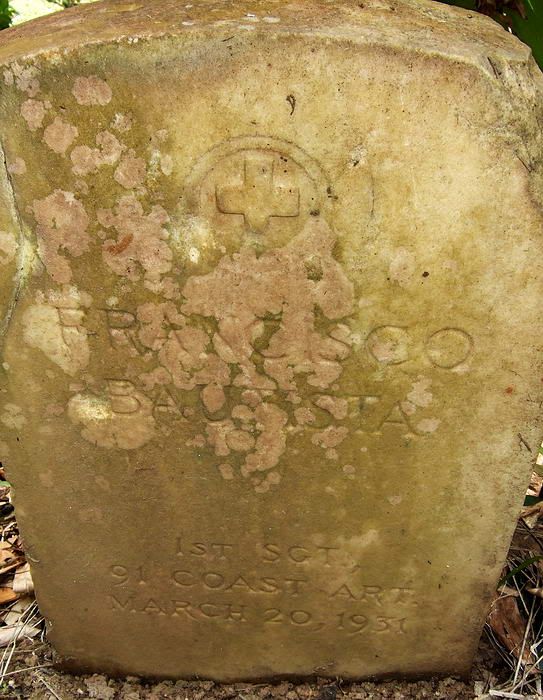
FRANCISCO BAUTISTA, 1st SGT, 91 COAST ART., MARCH 20, 1931
Today all the sites I plan to visit are near the beach so let’s head down that way. Within a minute you will see a stream to jump across and then we follow it to the beach. Even though now is the middle of a very dry El Nino season in the Philippines, there is still a steady stream of water flowing down towards the ocean.
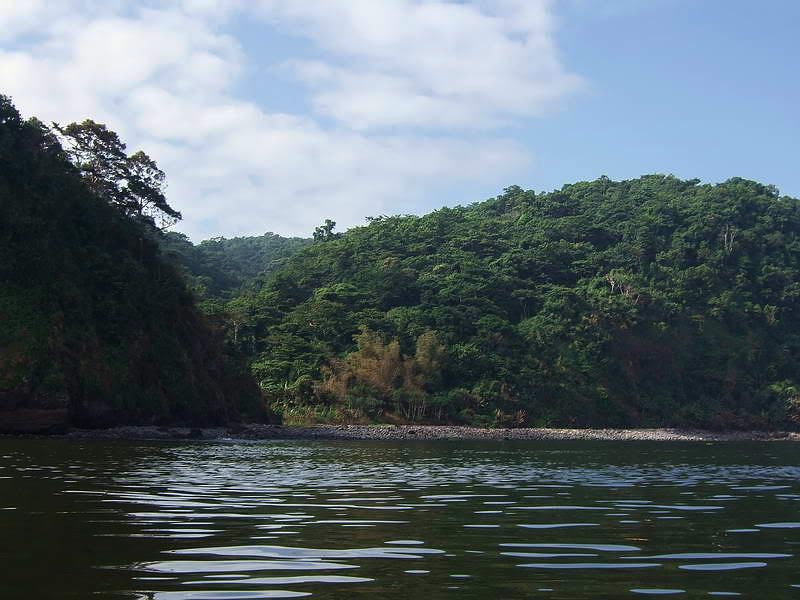
Off shore view of James Ravine from a previous trip.

The view across James Ravine at beach level looking towards the west. Rock Point is in the distance.
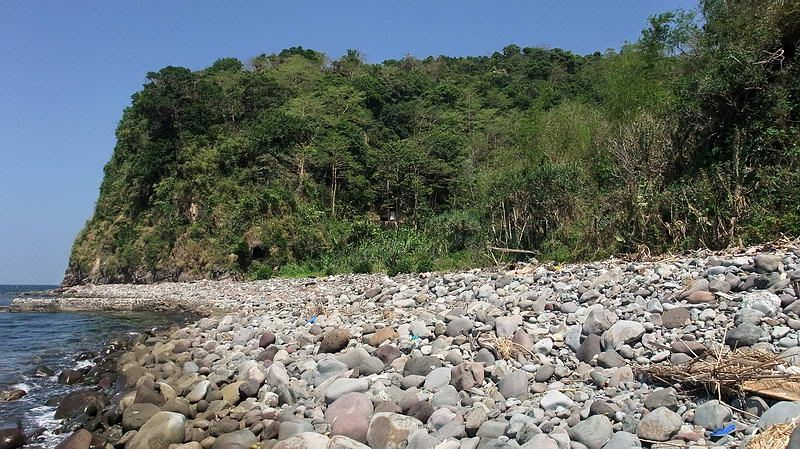
The view across James Ravine at beach level looking towards the east. Straight ahead just left of center is a dark spot at the base of the cliff. This is a damaged machine gun casemate with a tunnel system behind it.
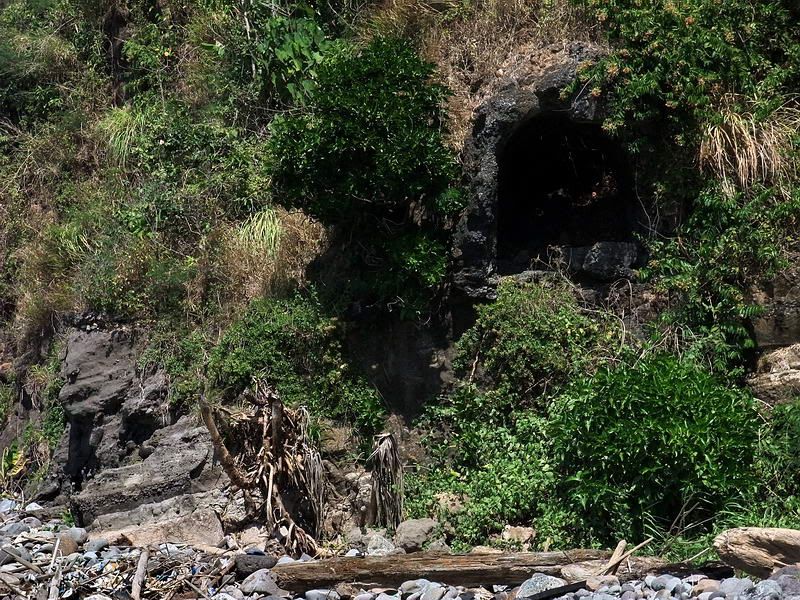
The damaged machine gun casemate.
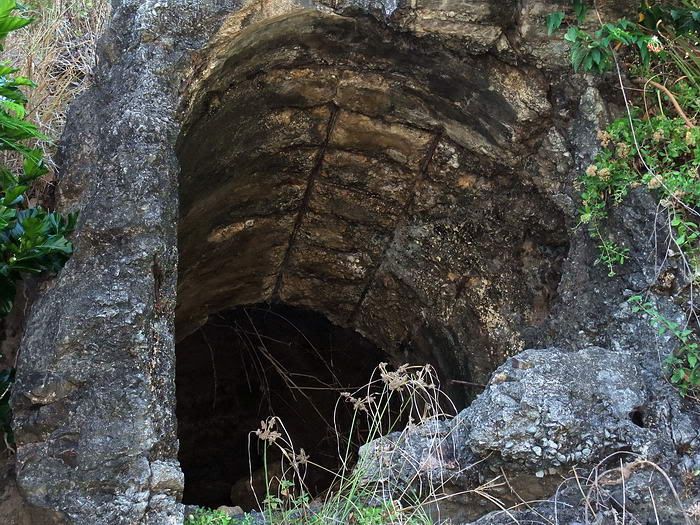
Looking up into the casemate.
At another opening of this same tunnel, the map shows a 37mm gun at that exact position. Perhaps it was in the entrance, I do not know. I was not in the tunnel on this trip but I remember there are even two more entrances.
Time to get to work for armyjunk. First on the list is the Cable Terminal Manhole located at the upper edge of the rocky beach. This manhole was an intermediate point between the ocean and the Mine Casemate further up the ravine. It contains conduits in which the cables for controlling the electrical anti-ship mines passed through.
I had seen this before but did not know what it was. On the map you can see a zig zag pattern of concrete beach defenses. The manhole is just in front of it.
On top of the structure is a circular manhole going down into the small square room below.
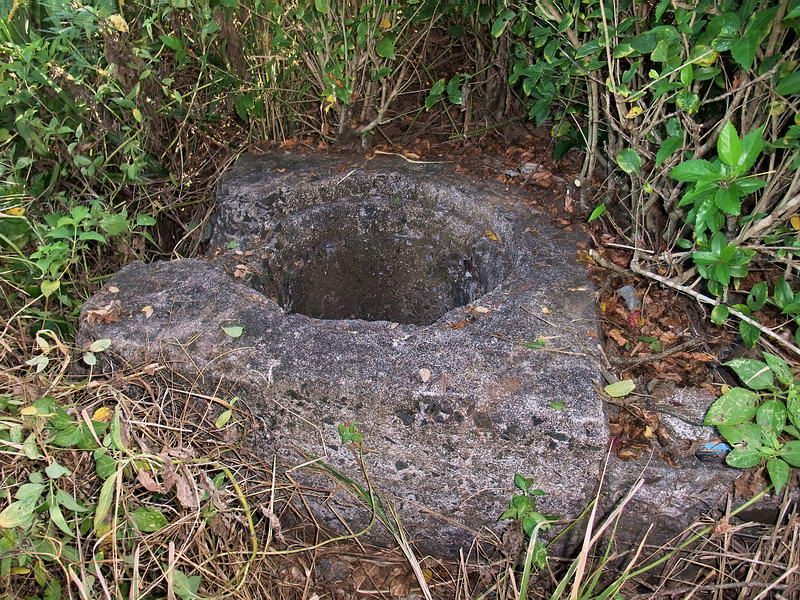
Top of the Cable Terminal Manhole.
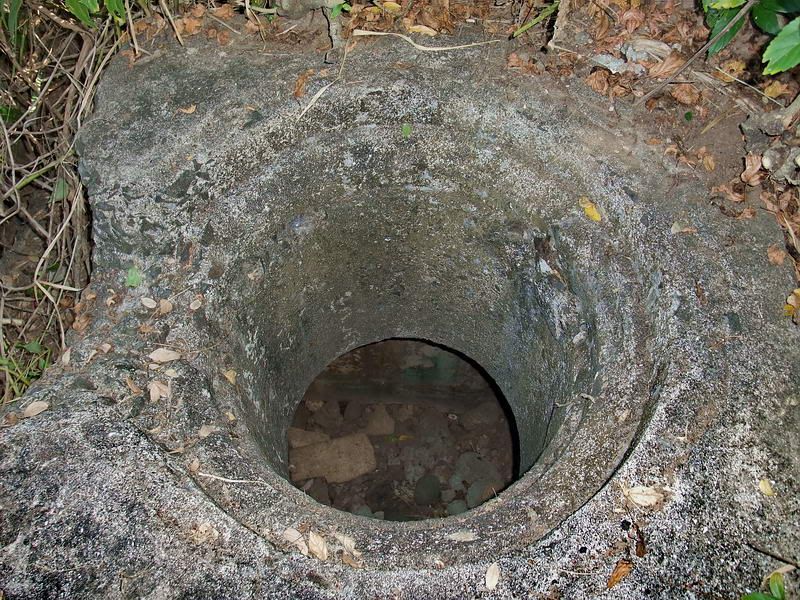
The top probably had a round metal cover.

Looking towards the ocean, here is a view of the rear entrance. Part of the zig zag concrete beach defenses is at the bottom of the photo.
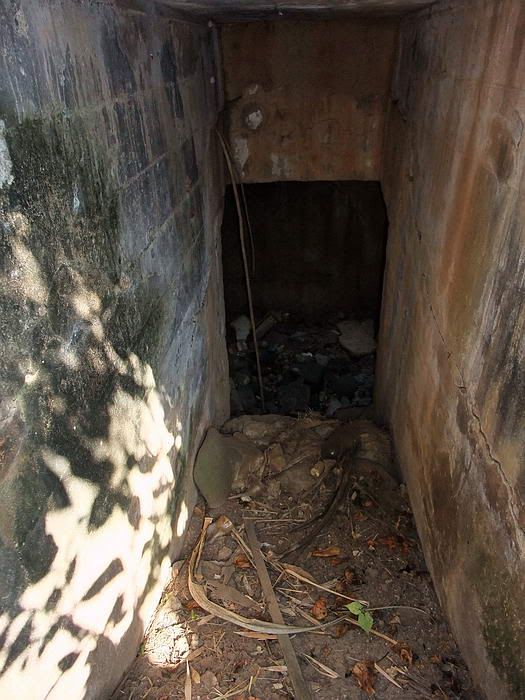
A door and sloped passageway on the inland side lets you get inside much easier than via the manhole.
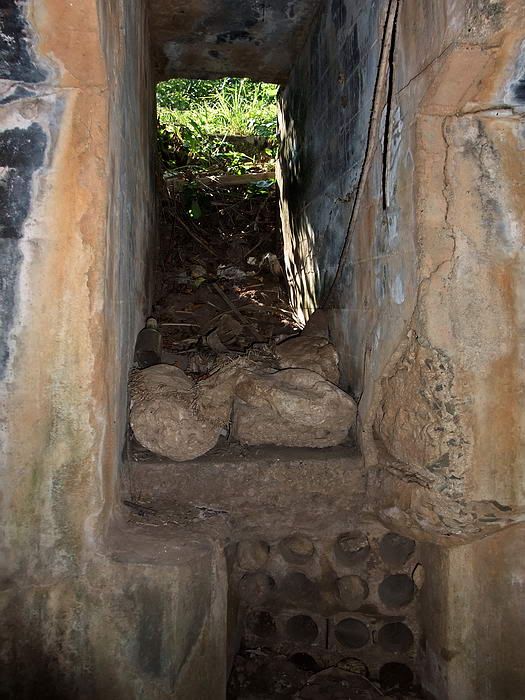
Looking back out the entrance. Note the cable conduits below the entrance.
Close-up of the cable conduits facing the Mine Casemate that I covered in this trip report:
corregidor.proboards.com/index.cgi?board=threads&action=display&thread=645
Inside view looking towards the beach. At the top of the photo, note the rounded bottom part of the above manhole.
The damaged hole is shown on a blueprint as being the “new cable trench” to the ocean. Debris on the bottom covers up any trace of the “old cable trench.”

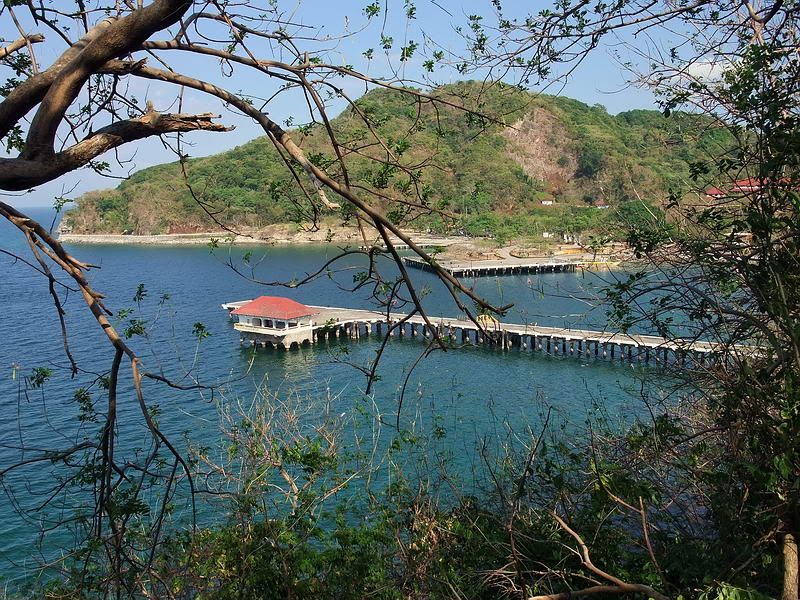
I am guessing that the concrete ‘mini dock’ built out into the water was actually just a protecting breakwater for the cables entering the ocean from the trench.
One location I wanted to visit was one of the old 1917 era defenses called IX-M-2 (the 2nd Machine gun position in Sector #9). It is close to the gun emplacement that armyjunk wants me to check out so I’ll visit there next.
There is a lot of thorny vegetation near the mouth of the ravine so I walked the coast a short ways before heading up the western slope. This turned out to be an easy approach. With in a few minutes a semi-circular concrete wall and a magazine were in front of me.
The IX-M-2 machine gun position.
This position is mostly destroyed and this view is really all that there is to see. I thought that after a couple photos on the inside that I would be on my way. Another one of Corregidor’s surprises was just around the corner.
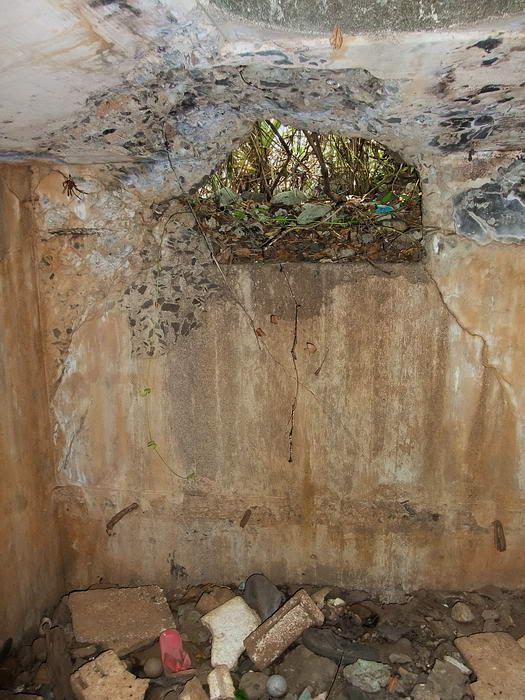
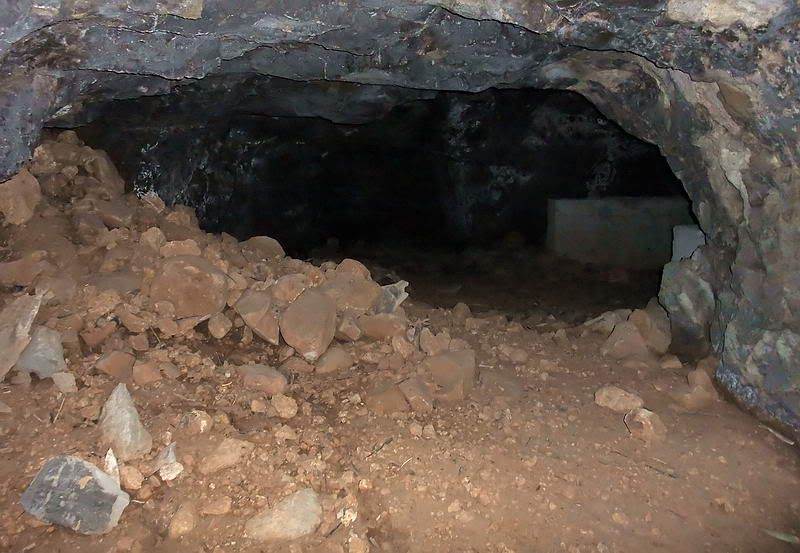
The interior of the magazine is quite small so I stood in one corner to take a photo of the opposite corner. There appeared to be a doorway which is now sealed by soil and rocks. A few rays of sunlight were filtering down from a gap along the top of the concrete wall.
After entering the magazine, here is a view of the opposite corner.
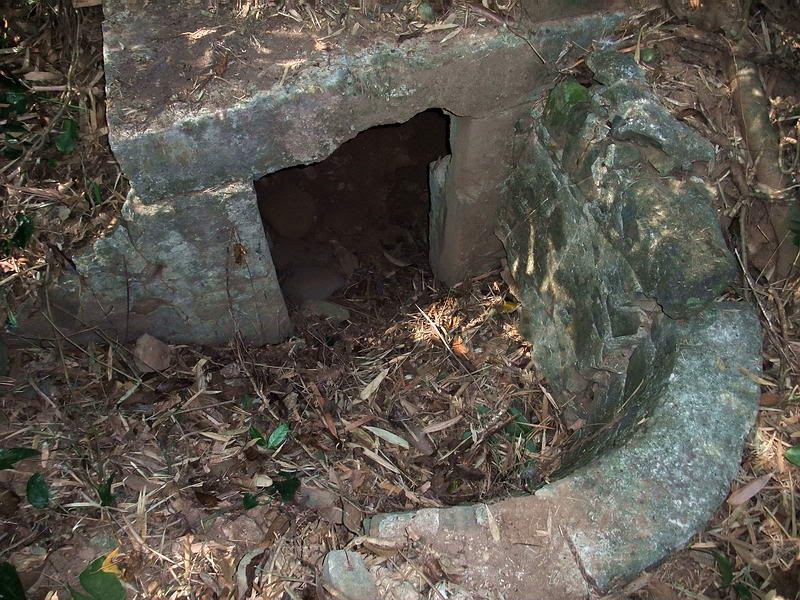
I moved to this corner to take a photo back towards the entrance from which I had just entered. As my eyes adjusted to the dark, I noticed that the dark area at the bottom was actually a small tunnel. Time to dig out my big flashlight for a good look.
I expect this is Japanese made for the simple reason that it is nothing more than a large rat hole. On my hand and knees I barely fit in there.
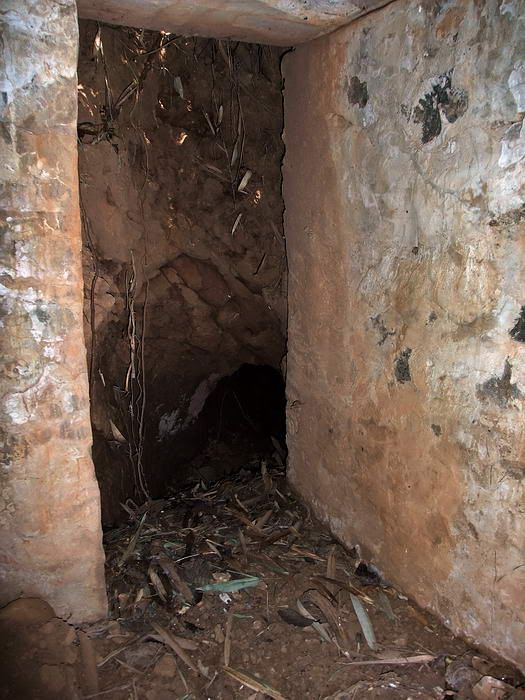
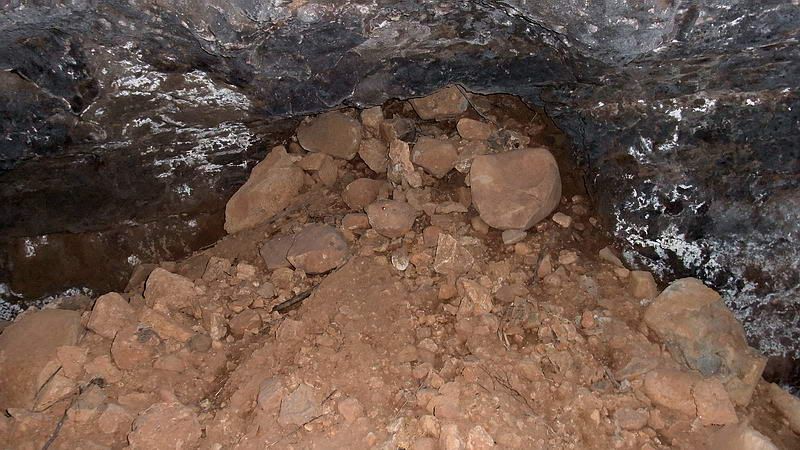
On leaving the IX-M-2 magazine, the tunnel has a gentle slope for a short ways then drops quickly at a steep 45 degree downward angle.
Start of the 45 degree drop just ahead.
From the start of the drop, I can see a large rock below me wedged into the tunnel and also blocking some smaller rocks from falling further. There is a gap to the right and looking past the large rock, the tunnel goes a long way down.
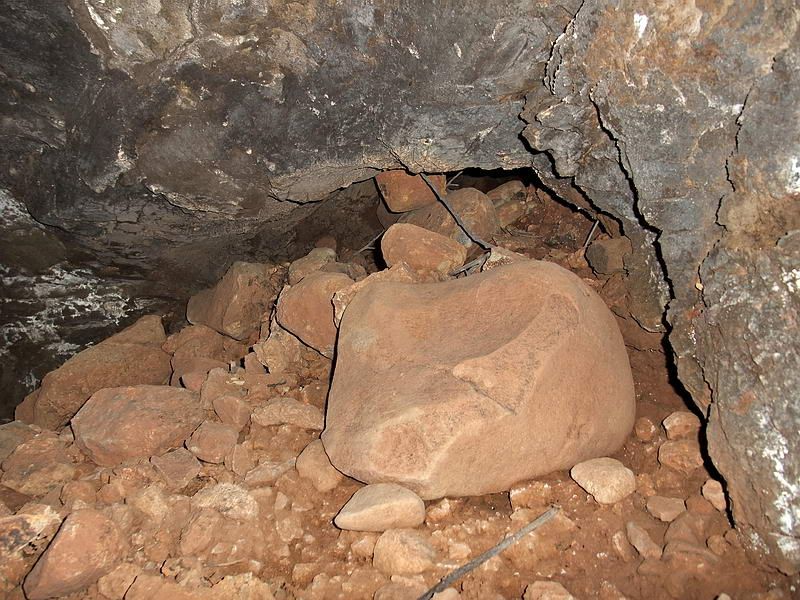
This photo is looking down the 45 degree decline. You can see the rounded rocks blocking the tunnel.
When I got back outside and saw how far it is down to the beach, I am sure that the tunnel does or did exit at beach level. There is a lot of vegetation along the edge of the beach so I did not see a tunnel entrance when I walked by there earlier.
At one location there are two vertical metal rods welded onto angle iron to provide roof support. That tells me that this tunnel never was any larger than what I see now.
View of the metal roof supports.
Another interesting thing in the tunnel is the remnants of two communication cables coming up the side of the tunnel. Both are cut off at the top where the tunnel levels out so I wonder if the cables were used as a handhold to help climb up the steep slope. The cables may have been part of the anti-ship mines system and a surplus chunk of them used for this purpose.
Two rusted cables being guarded by mommy spider at the bottom.
Spiral steel rods surround the paired copper wires to provide the cable’s strength/protection. The white material on the cables is from the spiders.
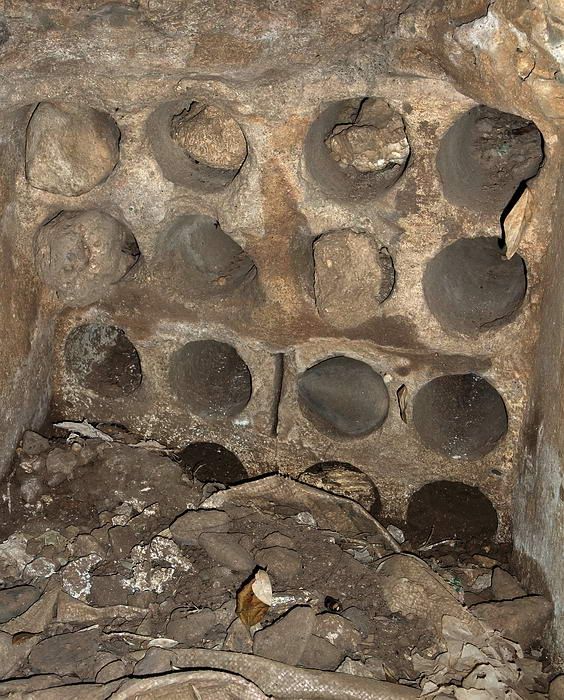
One thing I was wondering about is the big rocks inside the main door. They are lined up against the wall inside the magazine. Looking around you realize that there is no way for this to occur naturally. Look at their shape, they would be easy to roll here from somewhere else. My guess is that they were brought here to block the tunnel down to the beach if an enemy decided to attempt that approach up the hill.
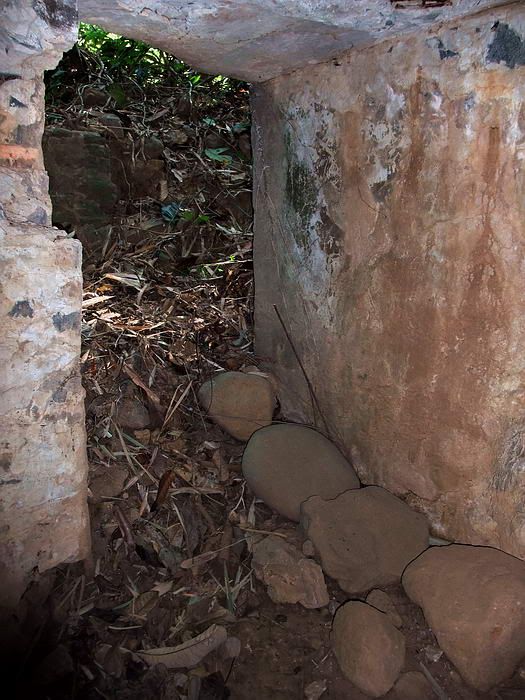
Rocks lined up inside the main doorway.
A quick look back inside the tunnel tells me that the big rock blocking the tunnel did not come anywhere from the ceiling. It must have been rolled down there and that one big rock did the job of preventing anyone from coming up. Even some of the smaller rocks are quite rounded. Just speculation on my part of course.
My last destination for the day was the nearby “Ron’s Tunnel”. It is (unofficially) named after Ron Benedero who is the CFI manager for Corregidor Island. The tunnel, which is actually a gun emplacement, does not appear on any map so was a surprise to the people he first showed it to. As batteryboy says, it does remind me of the remote Battery Monja on the south side of Corregidor.
Does anyone know the history of this gun emplacement? Is it mentioned anywhere? Did it have a battery name?
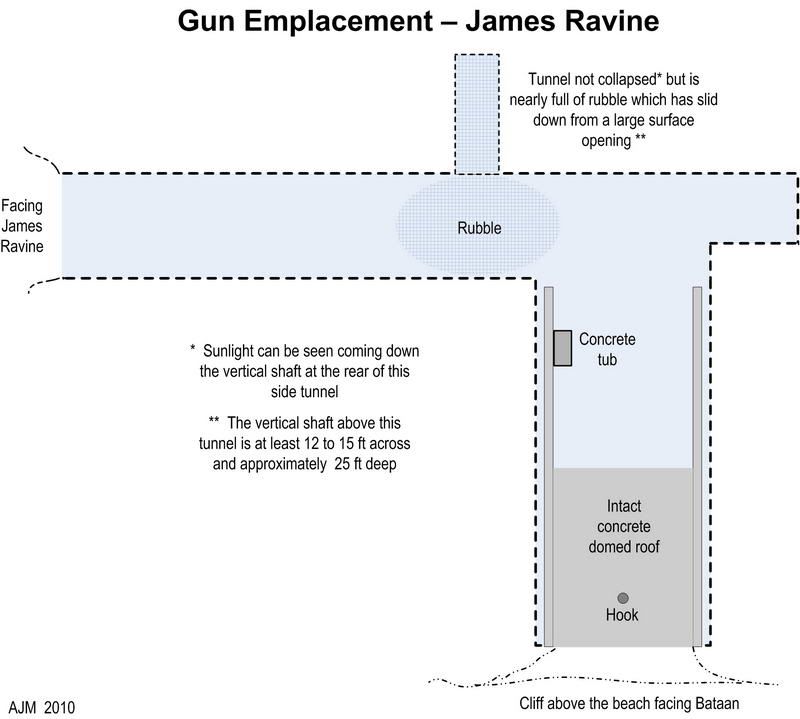
Here is a sketch of Ron’s tunnel to use as a guide when viewing the photos.
View as you approach the side entrance facing James Ravine.
Looking back out the side entrance facing James Ravine.
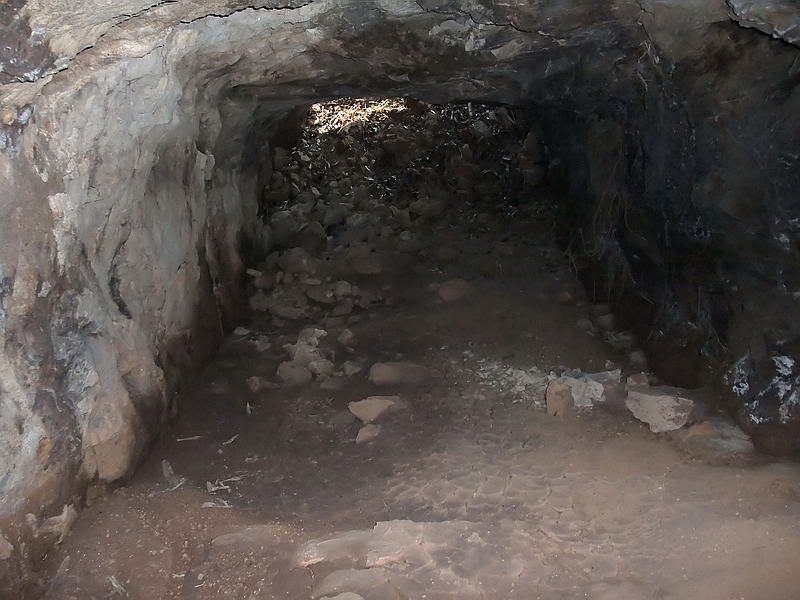
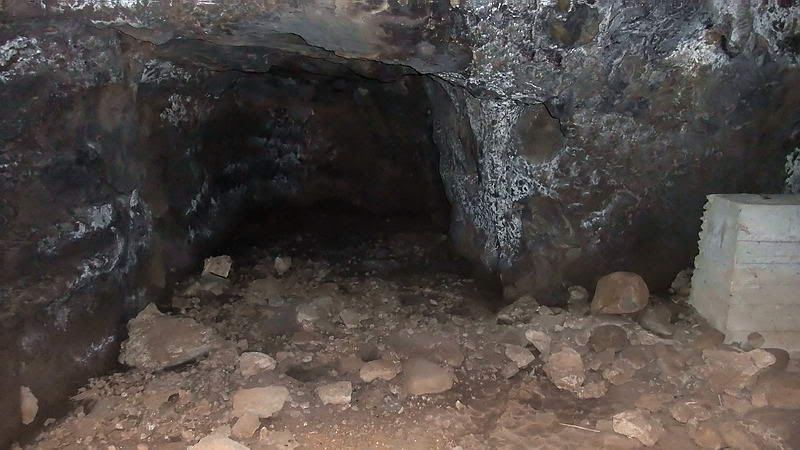
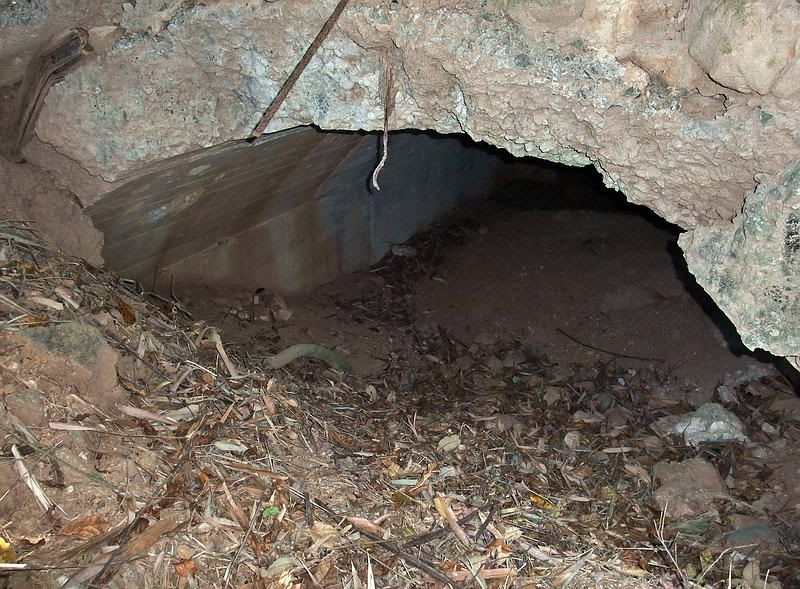
The view deeper into the tunnel. Ahead to the right is the tunnel out to the cliff face where the gun would have or may have been emplaced. Straight ahead is a short dead ended lateral.
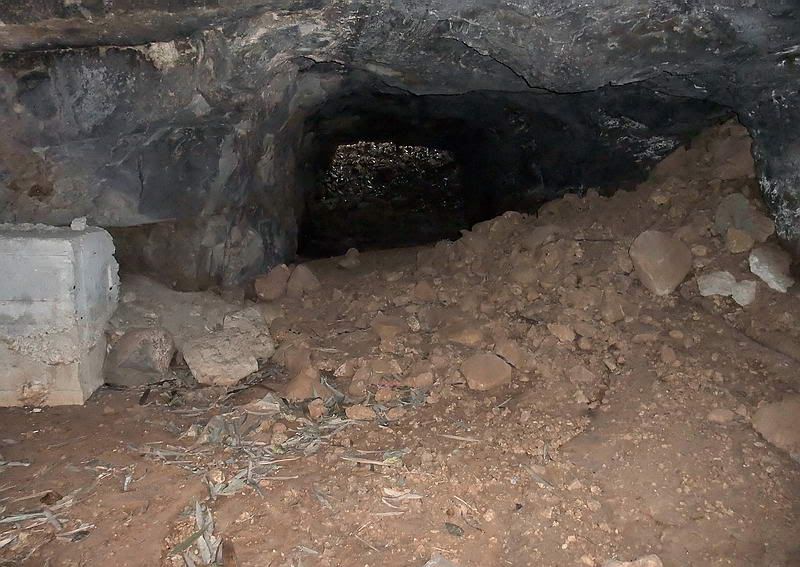
Notice all the soil and rocks that has entered the tunnel from the left hand side. This came from a small lateral tunnel that is almost completely sealed.
Looking straight at the lateral tunnel and all the rubble that has fallen out of it. The lateral looks completely sealed.
Close-up view of the top of the lateral where you can see an opening between the rubble and the ceiling.
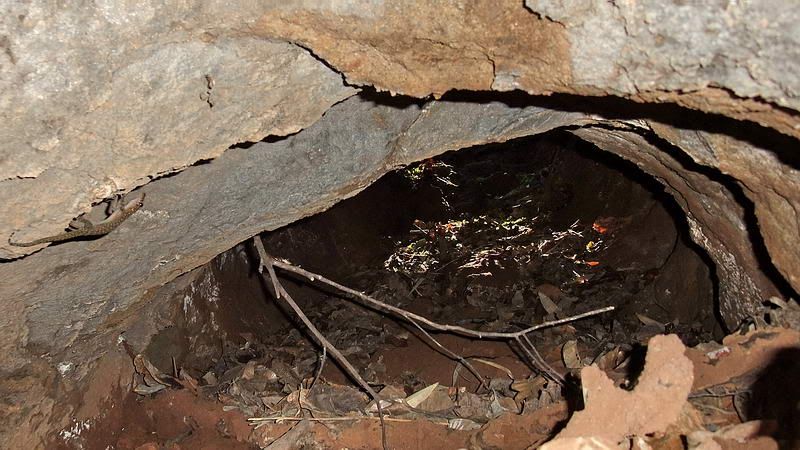
By sticking my arm through the opening and taking a photo, you can see that most of the rubble is at the entrance and a person could actually crawl into here if he was crazy enough. That is sunlight shining down onto the rear of this lateral so it is definitely open up to the surface.
The hole above this lateral tunnel is in the same league as two other big holes on Corregidor Island (Middleside Tunnel air shaft and the upper entrance of Denver Tunnel). I can’t imagine it being caused by just erosion but I don’t really don’t know. With two big entrances, the emplacement below would not need a ventilating air shaft. Could the vertical shaft at the end of the lateral have been dug as an emergency exit and enlarged by erosion over time? Perhaps dug by the same people that dug the nearby IX-M-2 tunnel down to the beach? We will never know exactly what tunnel additions or modifications the Japanese made in James Ravine.
It is a little steep above the main tunnel but I quickly found the opening at the surface above the side lateral.
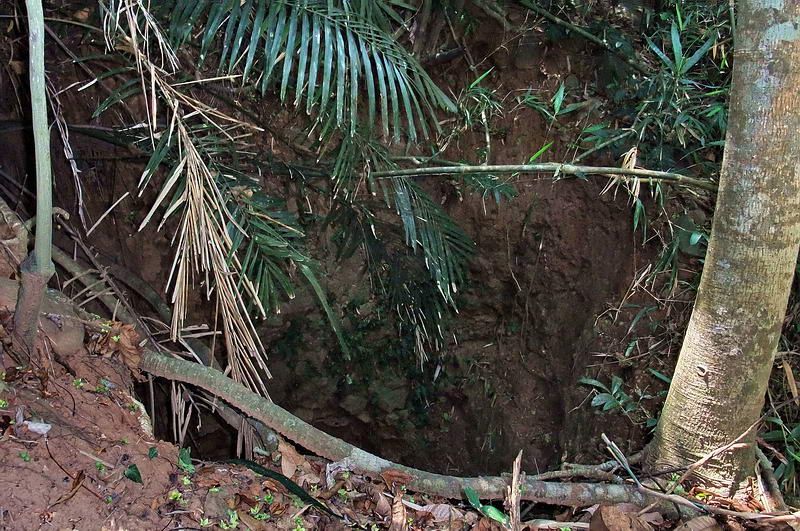
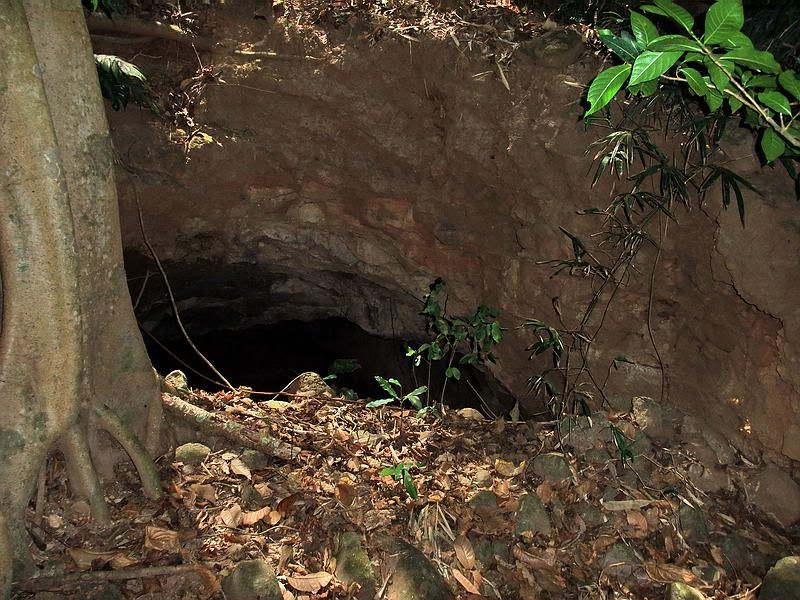
View as you approach the large shaft above the side lateral.
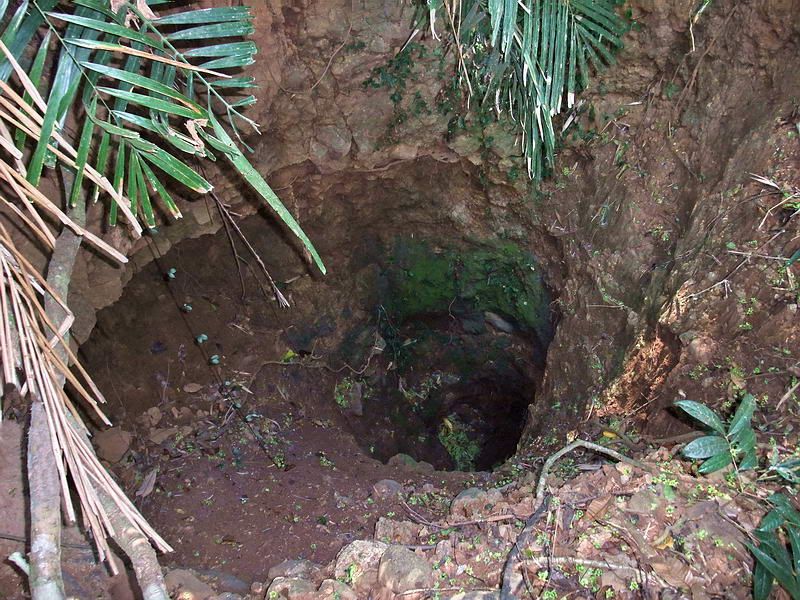
Looking straight down into the shaft using a bit of camera zoom to see past the vegetation at the top. I would estimate this hole is 12 to 15 feet across at the widest part and approximately 25 feet deep.
Continuing inside the tunnel just past the rubble, I am now standing at an intersection.
The gun position is to the right and a short lateral is ahead.
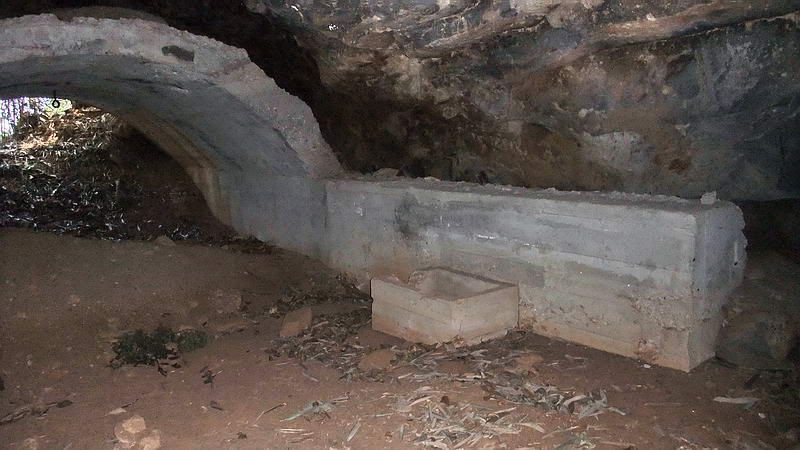
At the short lateral looking back towards the side entrance facing James Ravine. This view is almost the whole length of the rear of the tunnel.
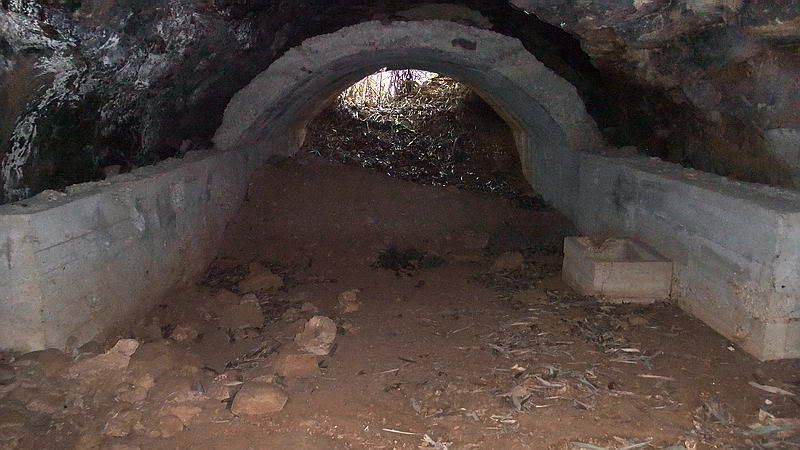
This view was taken from the rear of the tunnel and looking out towards the front entrance of the gun position. Concrete walls line the tunnel and the front half of the walls has a domed roof. I am guessing that the rear half never had this concrete dome as there are no large broken chunks of concrete lying around. Perhaps this gun position was still under construction when work was halted for some reason.
View of the left side wall. Note the metal sticking up in a few places along the top of the wall.
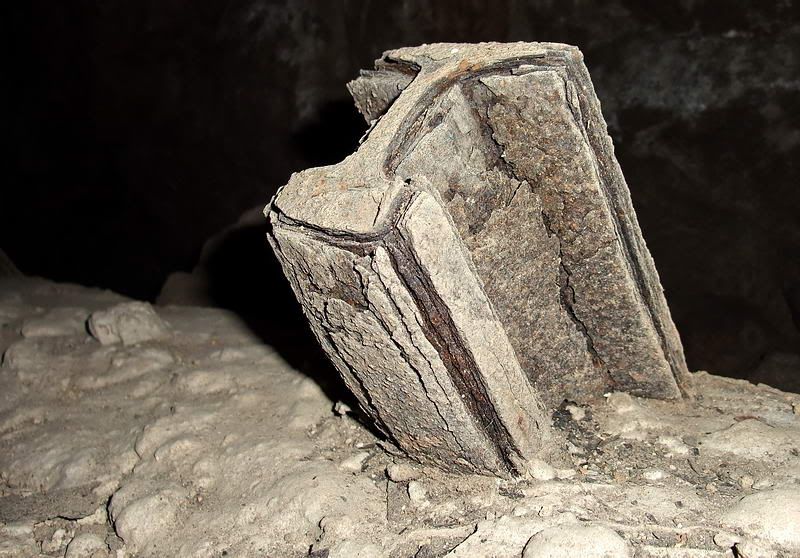
That metal is old trolley rails used for reinforcement.
View of the right side wall.
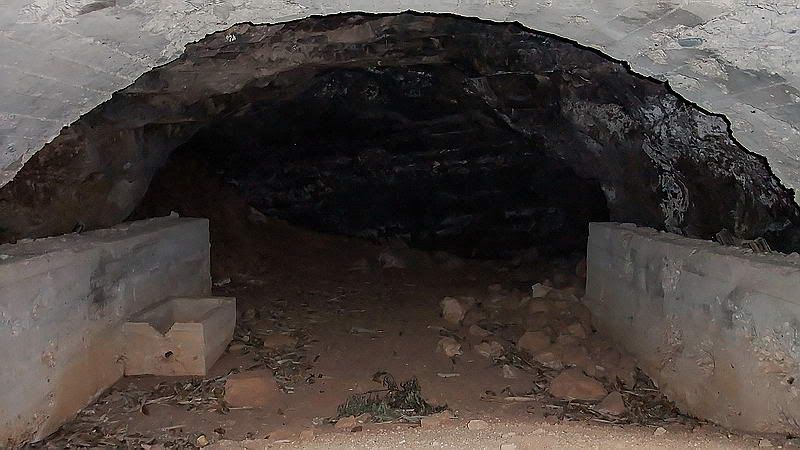
Looking towards the rear of the tunnel from under the domed roof.
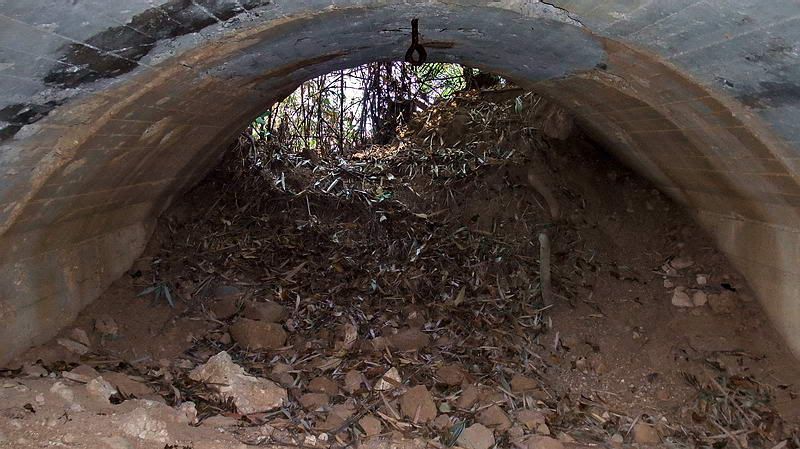
Looking towards the front entrance facing Bataan. From the entrance, the cliff down to the beach is only another 10 feet or so further. Note a metal loop is stuck in the roof.
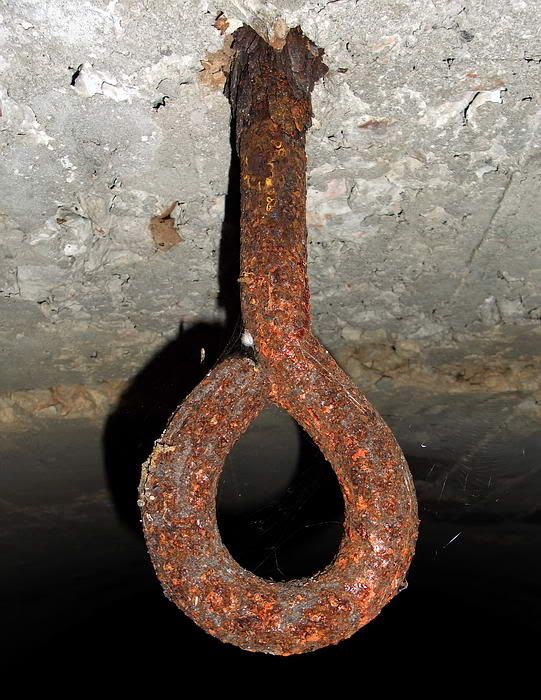
If this loop had the same purpose as metal rings at most batteries then it assisted in placement of the gun.
Exterior view of the damaged cliff side entrance.
After finishing in Ron’s Tunnel it was around 3pm so I decided to start back. There are always things to check out along the way. As I walked back up the ravine I decided to take the North Shore Road back to Bottomside.
At the eastern tip of the ravine (near the cliff above the coast) is Battery James. It has recently been cleaned out.
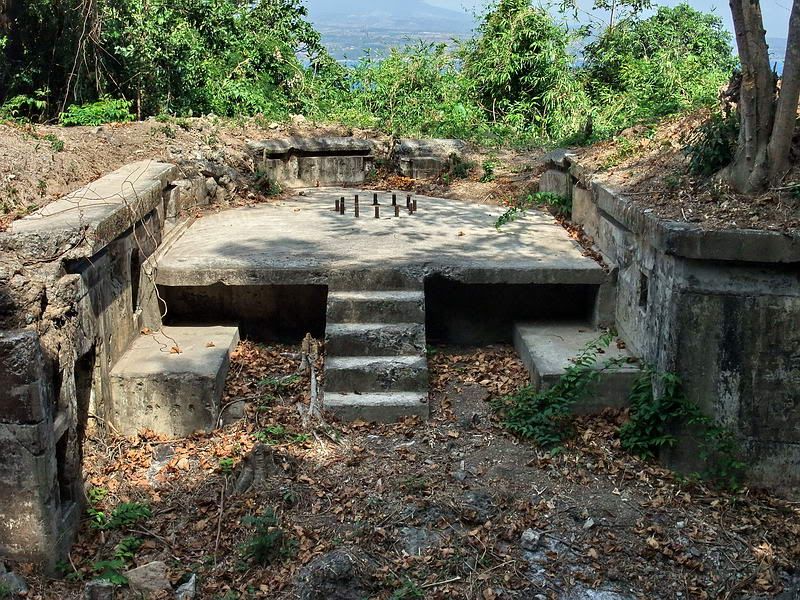
Battery James Gun #3 position.
When walking east, this is the first view of Bottomside you see from the North Shore Road. I am just below the Japanese AA gun that is located a little further up the hill. It is the only Japanese gun on Corregidor that still sits in its wartime location.
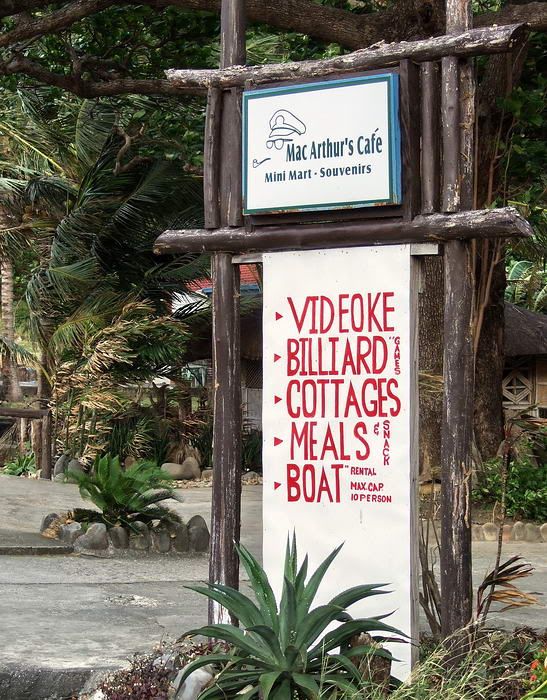
Our favorite post hike watering hole.
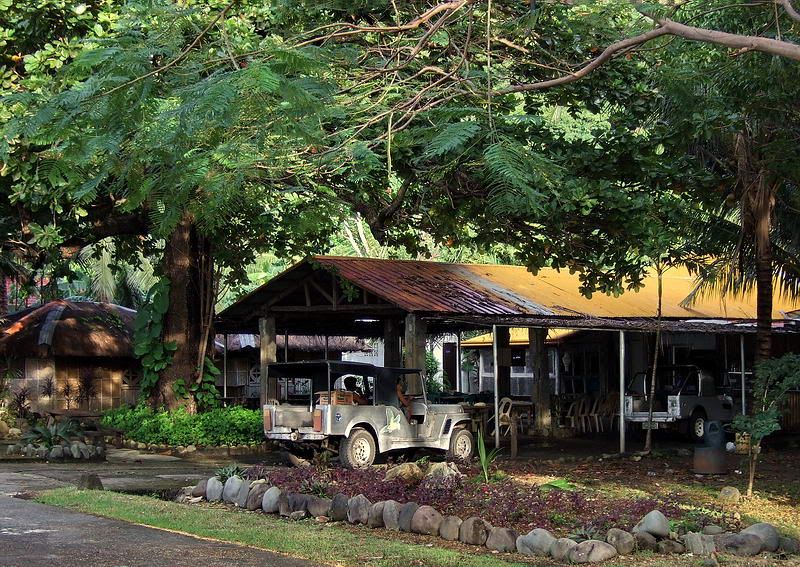
A view of MacArthur’s Café from the North Shore Road.

Back at the Corregidor Inn after another good day of exploring on “The Rock.”
Battle reports from 1945 detail the efforts to drive the Japanese from this area. The ground fighting was extensive and required the support of offshore Navy destroyers and the Air Force dropping bombs and napalm. By the time the battle was over, nineteen tunnels in the ravine had been sealed however many still exist today. This is the place where I once found a human bone.
Thanks to armyjunk and batteryboy for information and drawings that helped with locating some structures that I wanted to photograph. I found everything new on my list and also visited some previous locations I had explored before.

Map of James Ravine.
The easiest way to James Ravine is to get a ride to Middleside and head north from there. An old road down into the ravine is quite good walking due to there being a water pumping station still in operation. It is located near the bottom of the ravine and runs on an ‘as needed’ basis.
In addition to my photo goals for today, I thought I would also show you a few of the sights along the way.
For most of the trek from Middleside, the terrain is a gentle slope downwards. Just past a 155mm gun shelter, you come to an intersection so turn left. From here to the bottom, the road is a fairly steep zig zag along the eastern wall of the ravine down to the pumping station.
A section of the road between Middleside and the 155mm gun shelter.
155mm gun shelter
At a sharp switchback in the road is a small concrete machine gun position facing downhill. Inside is a pedestal with a bolt which I assume is for mounting the gun.
Looking in the side doorway of the machine gun position.
The pedestal and bolt inside the window facing down the ravine.
An enemy’s view of approaching the position. Hopefully he would never have gotten this close.
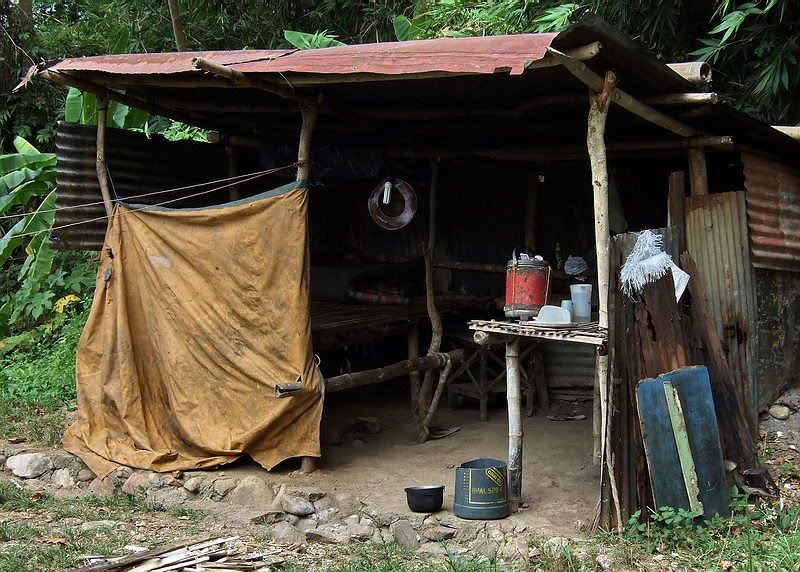
Soon you will come to the pumping station which is 35 to 40 feet in elevation above the rocky beach. It consists of a diesel and pump building and a guard shack. This shack is only occupied when someone is working there.
Guard shack.
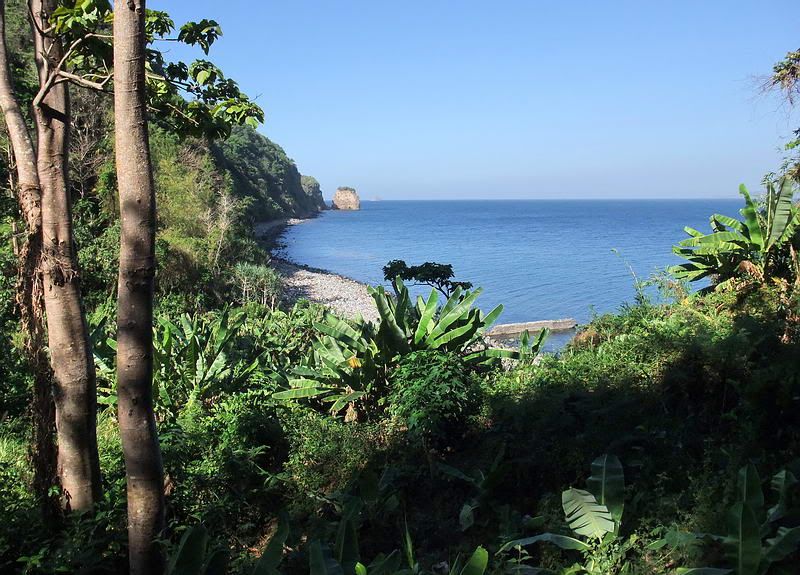
Early morning view along the coast taken from the guard shack.
As I mentioned earlier, wandering around James Ravine does require some effort especially if you get away from the few paths there. It is heavily overgrown with a thick canopy above you. Up from the beach itself, it is not as thick but then there is the steep slope to deal with. Exploring is hot, rough, strenuous and probably a bit dangerous but I find it one of the most interesting places on the whole island.
View back up James Ravine taken from near the guard shack.
Beside the pump building is the ruins of a large concrete water tank.
Destroyed water tank.
Interior view of the tank.
The road ends here but two paths continue, one leading toward the beach. Three Philippine Scouts tombstones are still lying beside the upper path.
FRANCISCO BAUTISTA, 1st SGT, 91 COAST ART., MARCH 20, 1931
Today all the sites I plan to visit are near the beach so let’s head down that way. Within a minute you will see a stream to jump across and then we follow it to the beach. Even though now is the middle of a very dry El Nino season in the Philippines, there is still a steady stream of water flowing down towards the ocean.
Off shore view of James Ravine from a previous trip.
The view across James Ravine at beach level looking towards the west. Rock Point is in the distance.
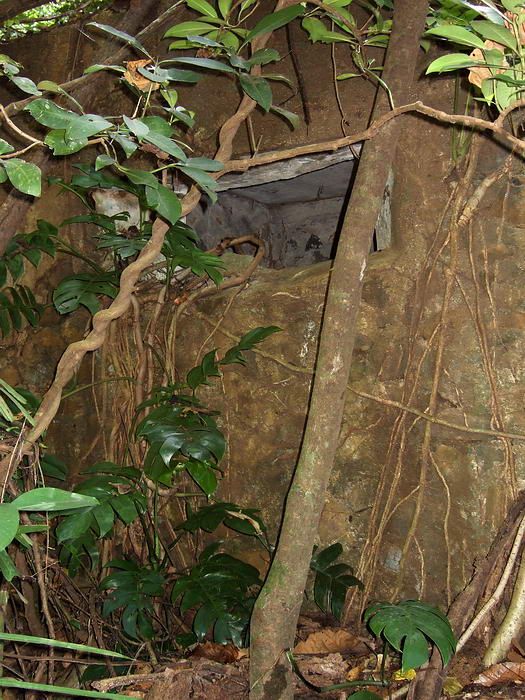
The view across James Ravine at beach level looking towards the east. Straight ahead just left of center is a dark spot at the base of the cliff. This is a damaged machine gun casemate with a tunnel system behind it.
The damaged machine gun casemate.
Looking up into the casemate.
At another opening of this same tunnel, the map shows a 37mm gun at that exact position. Perhaps it was in the entrance, I do not know. I was not in the tunnel on this trip but I remember there are even two more entrances.
Time to get to work for armyjunk. First on the list is the Cable Terminal Manhole located at the upper edge of the rocky beach. This manhole was an intermediate point between the ocean and the Mine Casemate further up the ravine. It contains conduits in which the cables for controlling the electrical anti-ship mines passed through.
I had seen this before but did not know what it was. On the map you can see a zig zag pattern of concrete beach defenses. The manhole is just in front of it.
On top of the structure is a circular manhole going down into the small square room below.
Top of the Cable Terminal Manhole.
The top probably had a round metal cover.
Looking towards the ocean, here is a view of the rear entrance. Part of the zig zag concrete beach defenses is at the bottom of the photo.
A door and sloped passageway on the inland side lets you get inside much easier than via the manhole.
Looking back out the entrance. Note the cable conduits below the entrance.
Close-up of the cable conduits facing the Mine Casemate that I covered in this trip report:
corregidor.proboards.com/index.cgi?board=threads&action=display&thread=645
Inside view looking towards the beach. At the top of the photo, note the rounded bottom part of the above manhole.
The damaged hole is shown on a blueprint as being the “new cable trench” to the ocean. Debris on the bottom covers up any trace of the “old cable trench.”
I am guessing that the concrete ‘mini dock’ built out into the water was actually just a protecting breakwater for the cables entering the ocean from the trench.
One location I wanted to visit was one of the old 1917 era defenses called IX-M-2 (the 2nd Machine gun position in Sector #9). It is close to the gun emplacement that armyjunk wants me to check out so I’ll visit there next.
There is a lot of thorny vegetation near the mouth of the ravine so I walked the coast a short ways before heading up the western slope. This turned out to be an easy approach. With in a few minutes a semi-circular concrete wall and a magazine were in front of me.
The IX-M-2 machine gun position.
This position is mostly destroyed and this view is really all that there is to see. I thought that after a couple photos on the inside that I would be on my way. Another one of Corregidor’s surprises was just around the corner.
The interior of the magazine is quite small so I stood in one corner to take a photo of the opposite corner. There appeared to be a doorway which is now sealed by soil and rocks. A few rays of sunlight were filtering down from a gap along the top of the concrete wall.
After entering the magazine, here is a view of the opposite corner.
I moved to this corner to take a photo back towards the entrance from which I had just entered. As my eyes adjusted to the dark, I noticed that the dark area at the bottom was actually a small tunnel. Time to dig out my big flashlight for a good look.
I expect this is Japanese made for the simple reason that it is nothing more than a large rat hole. On my hand and knees I barely fit in there.
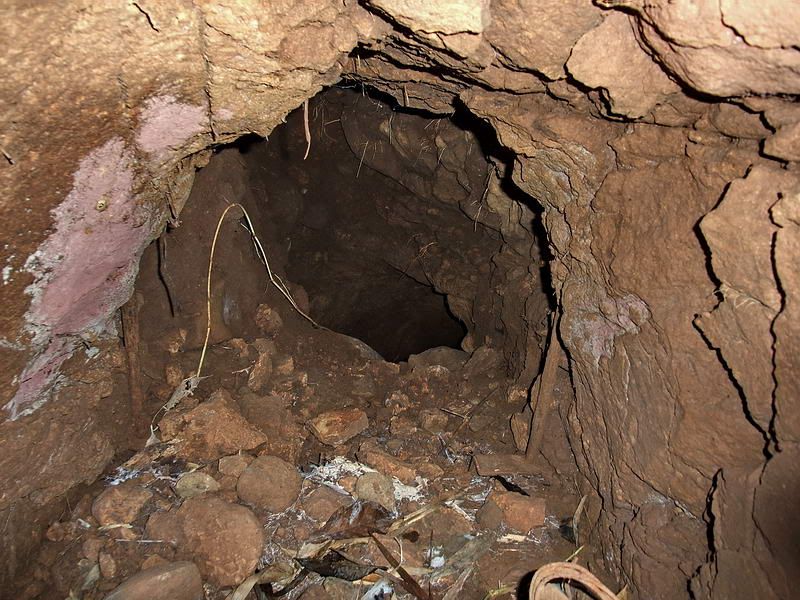
On leaving the IX-M-2 magazine, the tunnel has a gentle slope for a short ways then drops quickly at a steep 45 degree downward angle.
Start of the 45 degree drop just ahead.
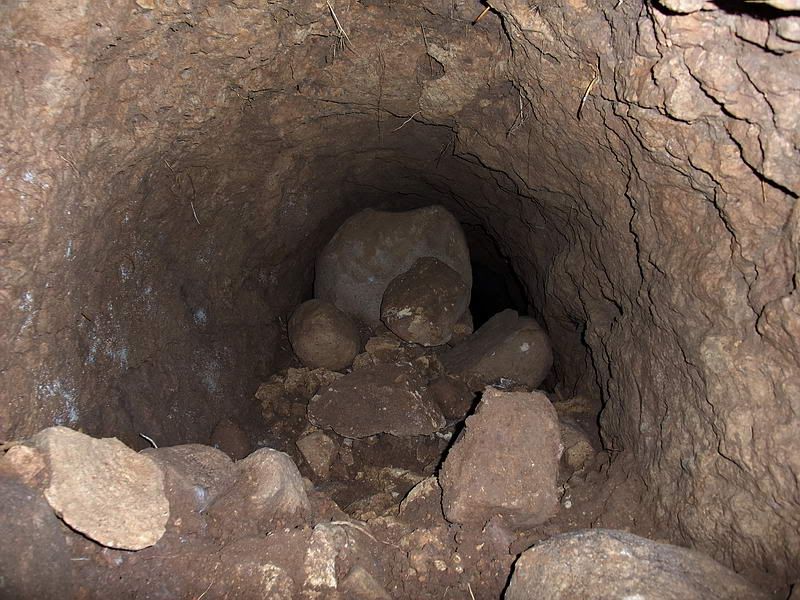
From the start of the drop, I can see a large rock below me wedged into the tunnel and also blocking some smaller rocks from falling further. There is a gap to the right and looking past the large rock, the tunnel goes a long way down.
This photo is looking down the 45 degree decline. You can see the rounded rocks blocking the tunnel.
When I got back outside and saw how far it is down to the beach, I am sure that the tunnel does or did exit at beach level. There is a lot of vegetation along the edge of the beach so I did not see a tunnel entrance when I walked by there earlier.
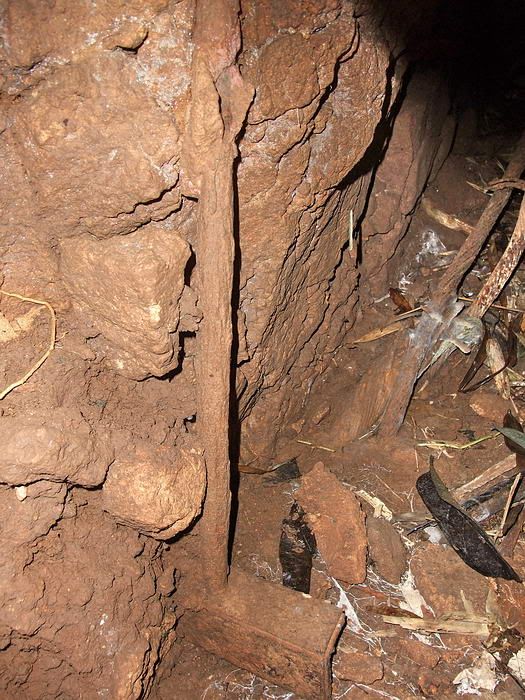
At one location there are two vertical metal rods welded onto angle iron to provide roof support. That tells me that this tunnel never was any larger than what I see now.
View of the metal roof supports.
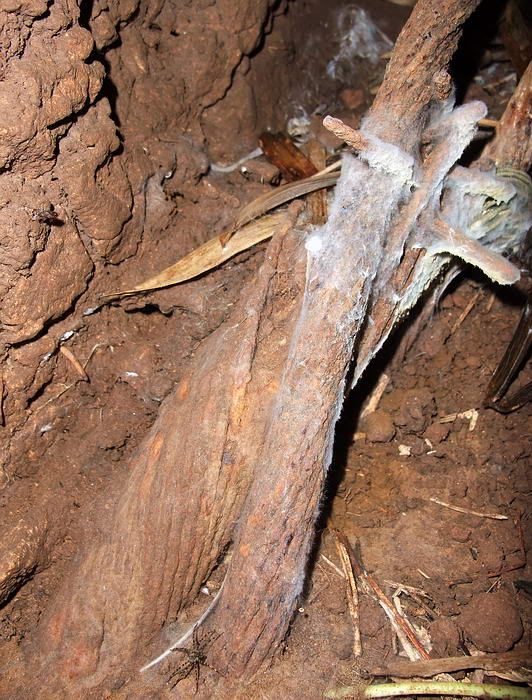
Another interesting thing in the tunnel is the remnants of two communication cables coming up the side of the tunnel. Both are cut off at the top where the tunnel levels out so I wonder if the cables were used as a handhold to help climb up the steep slope. The cables may have been part of the anti-ship mines system and a surplus chunk of them used for this purpose.
Two rusted cables being guarded by mommy spider at the bottom.
Spiral steel rods surround the paired copper wires to provide the cable’s strength/protection. The white material on the cables is from the spiders.
One thing I was wondering about is the big rocks inside the main door. They are lined up against the wall inside the magazine. Looking around you realize that there is no way for this to occur naturally. Look at their shape, they would be easy to roll here from somewhere else. My guess is that they were brought here to block the tunnel down to the beach if an enemy decided to attempt that approach up the hill.
Rocks lined up inside the main doorway.
A quick look back inside the tunnel tells me that the big rock blocking the tunnel did not come anywhere from the ceiling. It must have been rolled down there and that one big rock did the job of preventing anyone from coming up. Even some of the smaller rocks are quite rounded. Just speculation on my part of course.
My last destination for the day was the nearby “Ron’s Tunnel”. It is (unofficially) named after Ron Benedero who is the CFI manager for Corregidor Island. The tunnel, which is actually a gun emplacement, does not appear on any map so was a surprise to the people he first showed it to. As batteryboy says, it does remind me of the remote Battery Monja on the south side of Corregidor.
Does anyone know the history of this gun emplacement? Is it mentioned anywhere? Did it have a battery name?
Here is a sketch of Ron’s tunnel to use as a guide when viewing the photos.
View as you approach the side entrance facing James Ravine.
Looking back out the side entrance facing James Ravine.
The view deeper into the tunnel. Ahead to the right is the tunnel out to the cliff face where the gun would have or may have been emplaced. Straight ahead is a short dead ended lateral.
Notice all the soil and rocks that has entered the tunnel from the left hand side. This came from a small lateral tunnel that is almost completely sealed.
Looking straight at the lateral tunnel and all the rubble that has fallen out of it. The lateral looks completely sealed.
Close-up view of the top of the lateral where you can see an opening between the rubble and the ceiling.
By sticking my arm through the opening and taking a photo, you can see that most of the rubble is at the entrance and a person could actually crawl into here if he was crazy enough. That is sunlight shining down onto the rear of this lateral so it is definitely open up to the surface.
The hole above this lateral tunnel is in the same league as two other big holes on Corregidor Island (Middleside Tunnel air shaft and the upper entrance of Denver Tunnel). I can’t imagine it being caused by just erosion but I don’t really don’t know. With two big entrances, the emplacement below would not need a ventilating air shaft. Could the vertical shaft at the end of the lateral have been dug as an emergency exit and enlarged by erosion over time? Perhaps dug by the same people that dug the nearby IX-M-2 tunnel down to the beach? We will never know exactly what tunnel additions or modifications the Japanese made in James Ravine.
It is a little steep above the main tunnel but I quickly found the opening at the surface above the side lateral.
View as you approach the large shaft above the side lateral.
Looking straight down into the shaft using a bit of camera zoom to see past the vegetation at the top. I would estimate this hole is 12 to 15 feet across at the widest part and approximately 25 feet deep.
Continuing inside the tunnel just past the rubble, I am now standing at an intersection.
The gun position is to the right and a short lateral is ahead.
At the short lateral looking back towards the side entrance facing James Ravine. This view is almost the whole length of the rear of the tunnel.
This view was taken from the rear of the tunnel and looking out towards the front entrance of the gun position. Concrete walls line the tunnel and the front half of the walls has a domed roof. I am guessing that the rear half never had this concrete dome as there are no large broken chunks of concrete lying around. Perhaps this gun position was still under construction when work was halted for some reason.
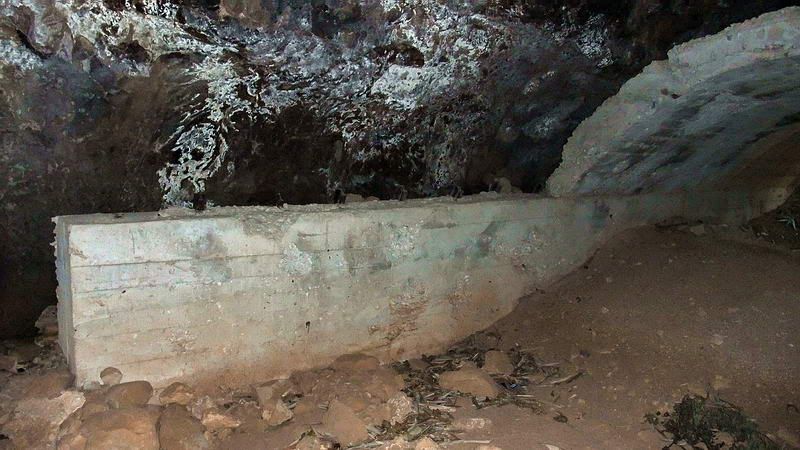
View of the left side wall. Note the metal sticking up in a few places along the top of the wall.
That metal is old trolley rails used for reinforcement.
View of the right side wall.
Looking towards the rear of the tunnel from under the domed roof.
Looking towards the front entrance facing Bataan. From the entrance, the cliff down to the beach is only another 10 feet or so further. Note a metal loop is stuck in the roof.
If this loop had the same purpose as metal rings at most batteries then it assisted in placement of the gun.
Exterior view of the damaged cliff side entrance.
After finishing in Ron’s Tunnel it was around 3pm so I decided to start back. There are always things to check out along the way. As I walked back up the ravine I decided to take the North Shore Road back to Bottomside.
At the eastern tip of the ravine (near the cliff above the coast) is Battery James. It has recently been cleaned out.
Battery James Gun #3 position.
When walking east, this is the first view of Bottomside you see from the North Shore Road. I am just below the Japanese AA gun that is located a little further up the hill. It is the only Japanese gun on Corregidor that still sits in its wartime location.
Our favorite post hike watering hole.
A view of MacArthur’s Café from the North Shore Road.
Back at the Corregidor Inn after another good day of exploring on “The Rock.”


 Cheers.
 ? I swear, that's it with yarns about my Grandpappy.
